| Beginning with a slab of Ebony approximately 3-1/2" x 25",
I first established a flat face by running one face on my jointer;
once the
face was established, I used the jointer to establish one edge as
flat and square to the finished face. Then, I thicknessed the piece
to exactly 1/4" using my planer. Finally, I cut the resulting
fingerboard blank to 2-1/4"; I should have left it a little
wider (say, 2-3/4"),
but it looks like I'm lucky and the 2-1/4" width will be just
barely wide enough. The next step is to cut the fret slots in exact
position.
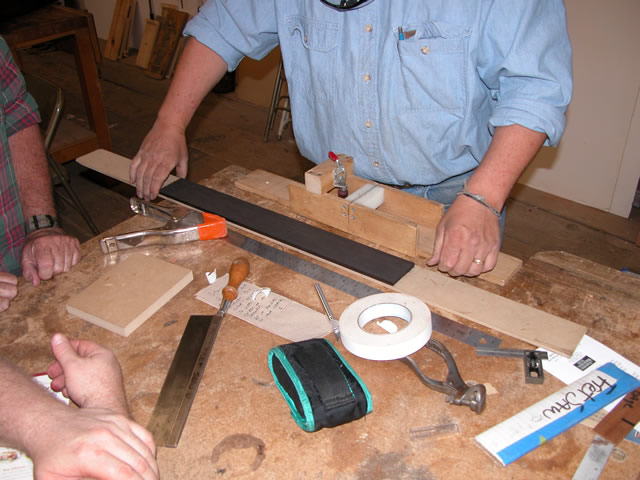
This process started with a template built from a luthier's layout
rule. |
 |
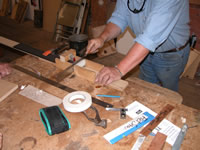
| Using a jig to cut perfectly perpendicular and at a constant depth,
a fret saw (kerfed at about .024") was used to cut the fret
slots. The fingerboard blank is double-sticked to the template,
and
the
template
is placed within the jig. Here, the initial (Fret 0) slot is established. |
 |
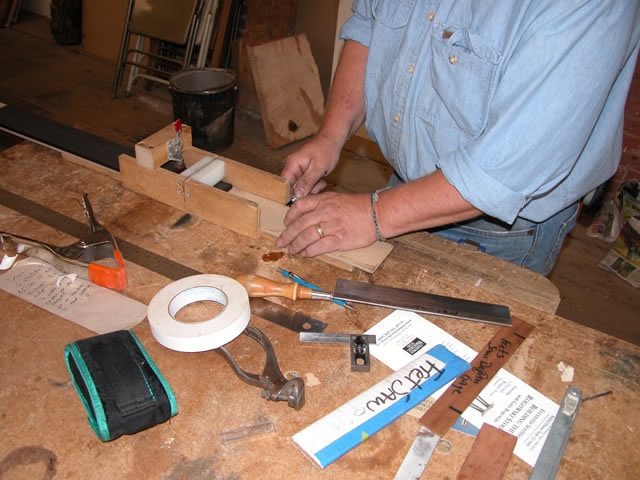
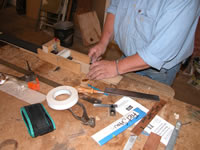
| Next, an "Exacto" knife is placed at precisely the position
of the Fret 1 as the template (with fingerboard attached) is advanced
for the next cut. This process continues until Fret #20 is cut. |
 |
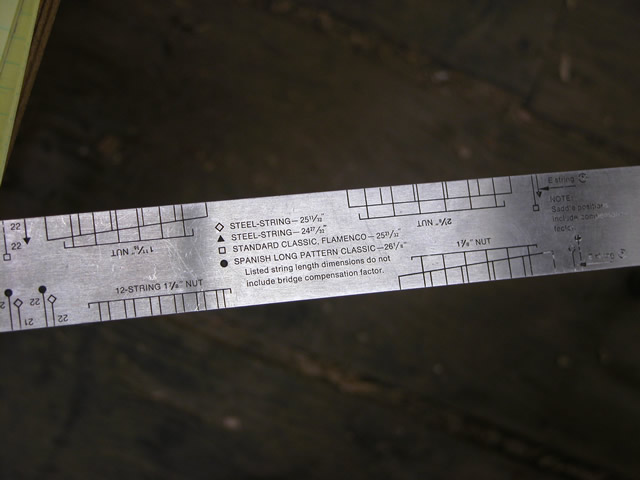
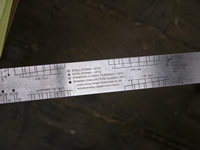
| This photo shows the end of the luthier's layout rule. Note that
the "scale length" used for this guitar is the 25-11/32" length.
This distance is the theoretical distance between the nut and the
bridge, although in practice, "compensation" is added to adjust for
the tendency of the strings to increase in tension when the strings
are pressed against the frets (1/8" additional at the high E and
1/4" additional at the low E). This compensation is added at the
bridge. |
 |
| The attached .PDF file lists out the theoretical distances for
each of the fret positions with a scale length of 25-11/32". |
 |
| Elapsed time for these steps:
4 hours ... See the main
page for the cumulative time. |
|