| Constructing the neck starts with facing, jointing, and thickness planing the rough mahogany stock. Pictured here is the thickness planing. |  |
| Shown is the target--roughing in the neck, including the head (the "bent" portion above the neck). The head is cut from the neck stock by cutting a "scarf joint", which as an acute angle joint. | 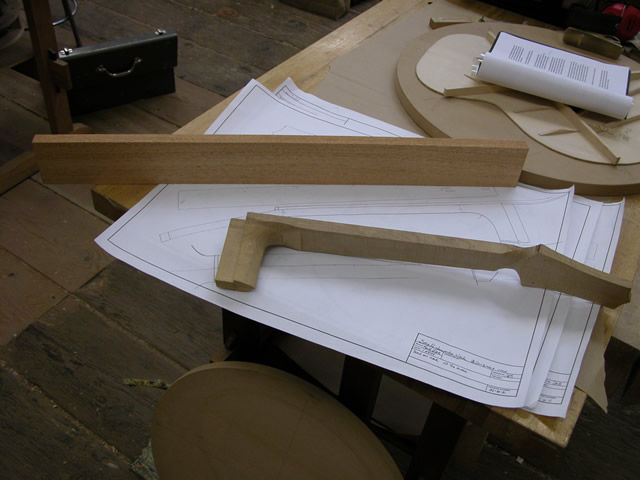 |
| Here, Dan Biasca is demonstrating the use of the bandsaw to cut the scarf joint. | 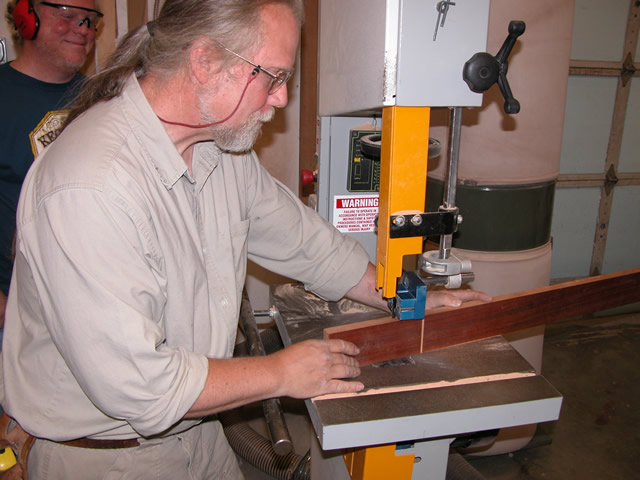 |
| Once the scarf joint is cut, the two angular surface are aligned and planed. This will create a tight glue joint. | 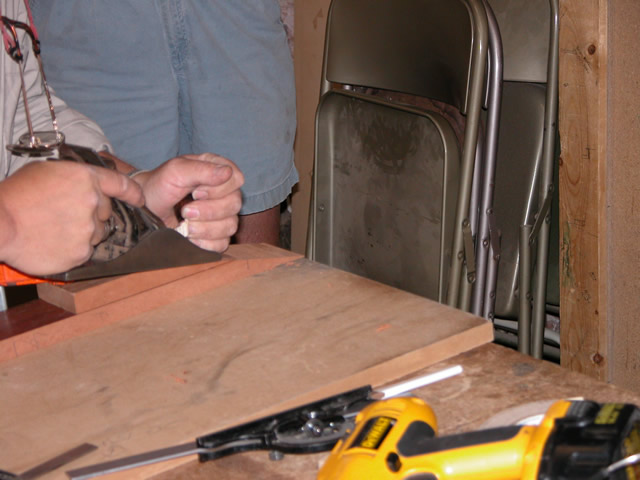 |
| Using two glue blocks to spread the clamp pressure over the thin scarf joints, the two pieces are joined together to form the angular head. | 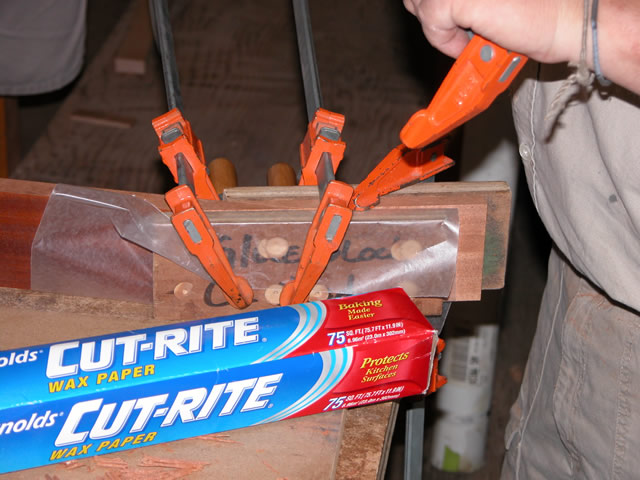 |
| Finally, once glued together, the face of the head is cleaned up using the plane. | 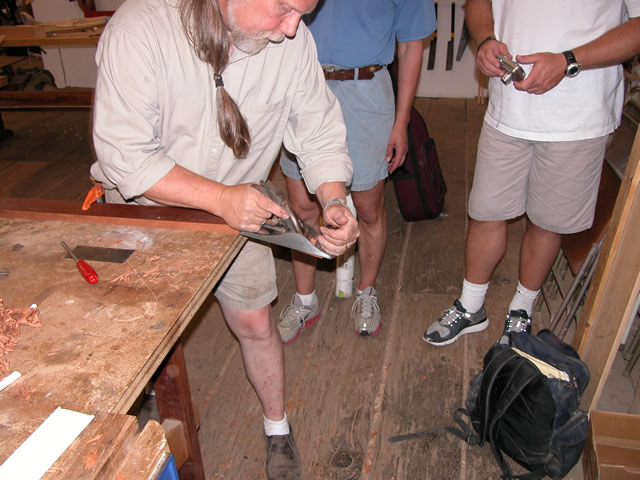 |
| At this point, the neck and head are dadoed with a groove to accept the truss rod. The cut is made by making an initial cut with a standard saw kerf, then the neck is turned around and passed against the fence on the other side. The width of the two cuts is measured, and increased if necessary to widen the dado to the width of the truss rod. This process continues, sneaking up on the final dimension by increasing the width between the saw and the fence about 1/32" at a time. |  |
| When completed, the truss rod is tested in the roughed-out neck. | 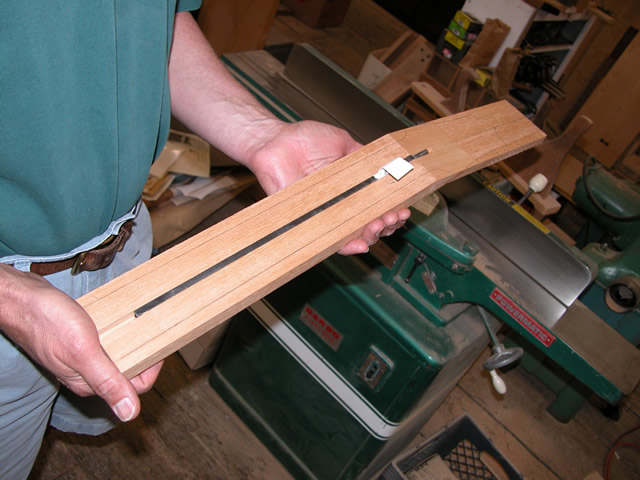 |
| The patterns for the neck and the head are traced on the stock, and the neck is rough-cut (shaping will occur after gluing up the fretboard). The off-cuts from the neck were used to add the "ears" on the head--the ears are small decorative scallops on each side of the head. | 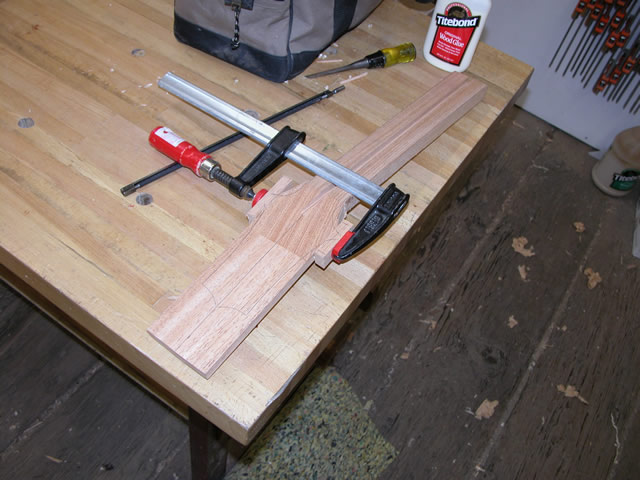 |
| Elapsed time for these steps: 4 hours... See the main page for the cumulative time. | |
| Two veneers--one of maple and one of ebony are placed on top of the head and are glued in place. This will form a decorative and protective cap on the head. | 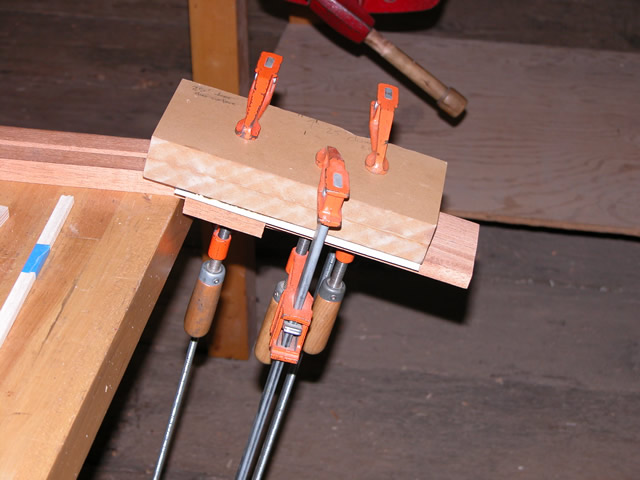 |
| Using cut-offs from the original neckboard, a hell is assembled and rough-sawn, using the bandsaw, to the eventual shape of the heel. |  |
| Once the head cap veneers are rough sawn and the heel is glued in position (the part of the heel that will contact the guitar is at the 14th fret), the neck is ready for placement of the fingerboard, shaping and carving, and placement on the guitar body. | 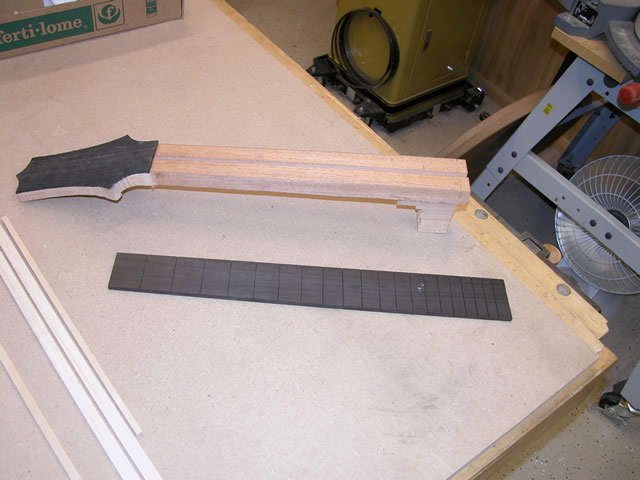 |
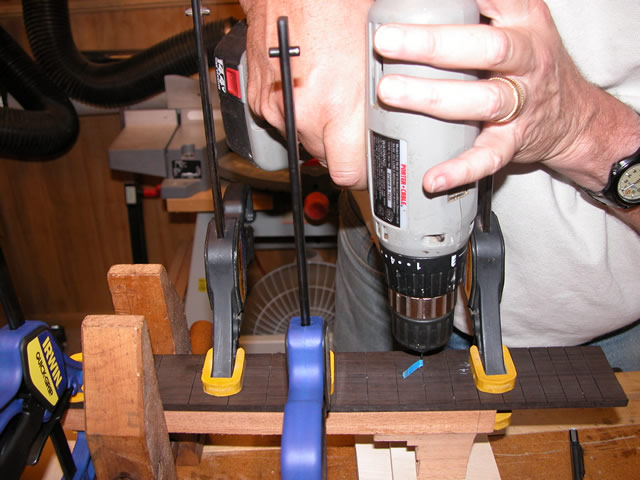
I carefully clamped the fingerboard in place on the roughed neck, then drilled dowel holes. Note that I "flagged" the drill bit so that I wouldn't exceed 1/4" depth of hole in the neck. I drilled two sets of dowels--one at the first fret and one set at the twelfth fret. I used a 1/16" drill bit (I first measured my frets to make sure that the 1/16" hole would be covered by the fret.) Then, I snipped the head off of some 16 gage wire nails, which I measured would just fit within the 1/16" holes. Once clamped in place, I also marked the fourteenth fret (visible in the photo), which I used to trim off the end of the neck. |
 |
| Here's a view of the resulting doweling. | 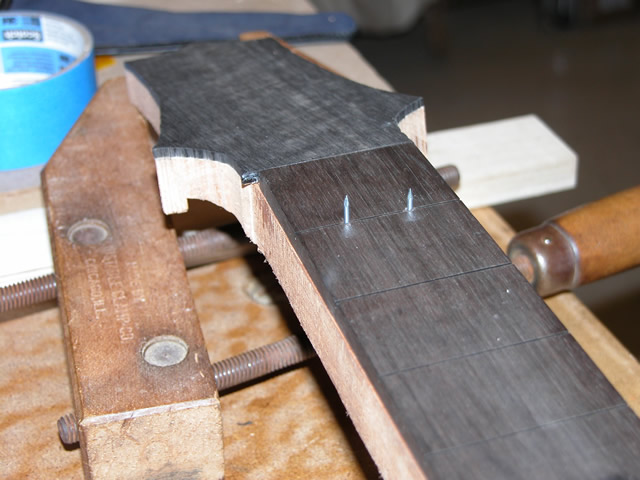 |
| Elapsed time for these steps: 7 hours... See the main page for the cumulative time. | |
| Now, the neck must be fit at the proper angle for the strings to have good action on the fingerboard. This begins by ensuring that the body is perfectly flat at the location where the neck will be joined. I used a scraper to get this area flat. |  |
| To help in determining the proper angle, I constructed a jig with a small runner that will fit within the truss rod slot. The jig is about 2" longer than the distance between the nut and the bridge on the guitar. | 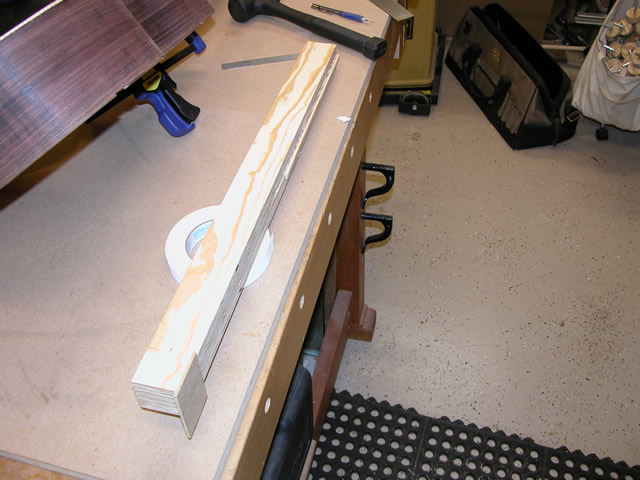 |
| I marked the bridge end of the jig at the scale length as shown (plus 1/8" for "compensation"), and used double-sided tape to place a 1/8" shim on the underside. When set correctly, the neck (without the fingerboard in place) should be angled so that there's a 1/8" gap between the end of this jig and the soundboard, which the shim indicates. |  |
| As can be seen on this photo, the neck angle doesn't allow the jig to be fully seated. The heel of the neck (where it meets the guitar body) must be angled slightly so that the jig may be fully seated along the length of the neck. |  |
| I marked the appropriate angle, and rough-sawed the angle using my band saw. |  |
| I then fine-tuned the heel angle, using a well-sharpened block plane and a sanding block. I worked carefully to avoid rounding the edges of the heel. Once the heel was very close, I decided I needed to complete the body before further fine-tuning. I will check the heel again once I've installed the heel bolt, carved the heel, and closed up the body. Each of those steps may slightly change the neck/body fit. |  |
| Elapsed time for these steps: 8 hours... See the main page for the cumulative time. | |
| Now, I turned my attention to installing the heel bolt. I have already drilled the hole for the heel bolt in the body assembly, shown here without the back installed. | 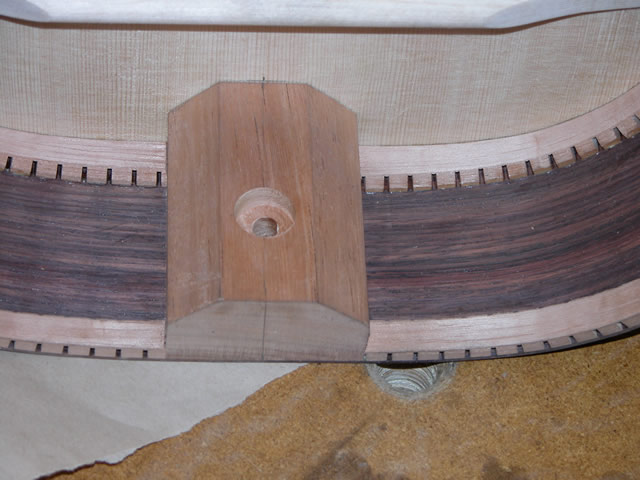 |
| To begin planning, I measure the distance that the threaded bolt insert will protrude from the guitar body, and add about 1/8"--this will become the depth of the hole I drill in the heel. | 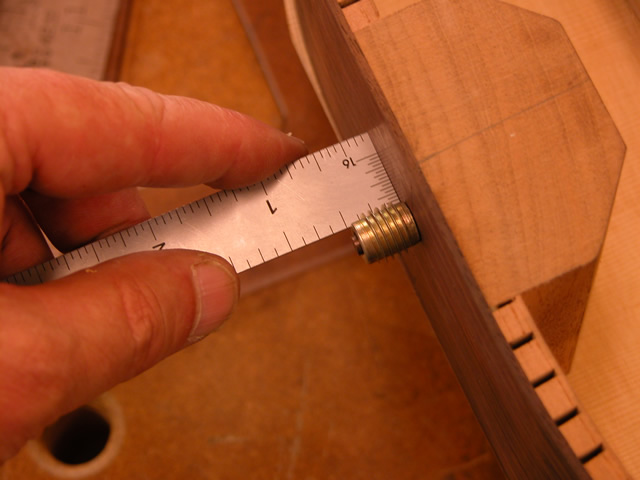 |
| I traced the image of the insert hole on the bottom of the heel. Dan Biasca suggested drilling and gluing a dowel into the heel to provide a stronger joint at the bolt insert. I laid out where the drilled hole will go, keeping the hole approximately 1/8" back from the edge of the heel. I've decided to install a 1/2" dowel. | 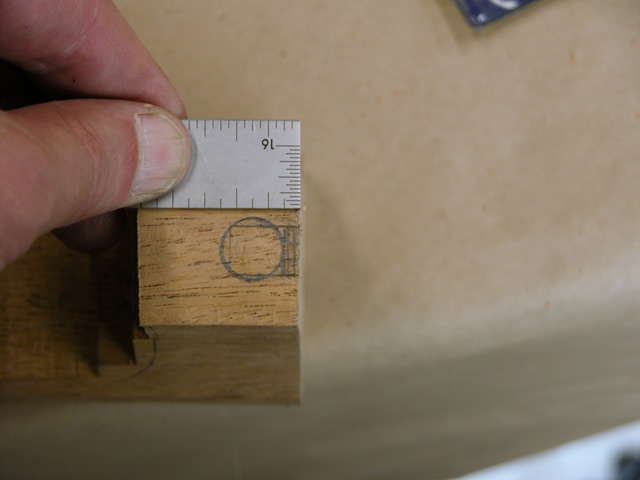 |
| The depth of the dowel will extend just beyond the 3/* hole that I will drill for the brass threaded insert. I drilled the hole using my drill press. | 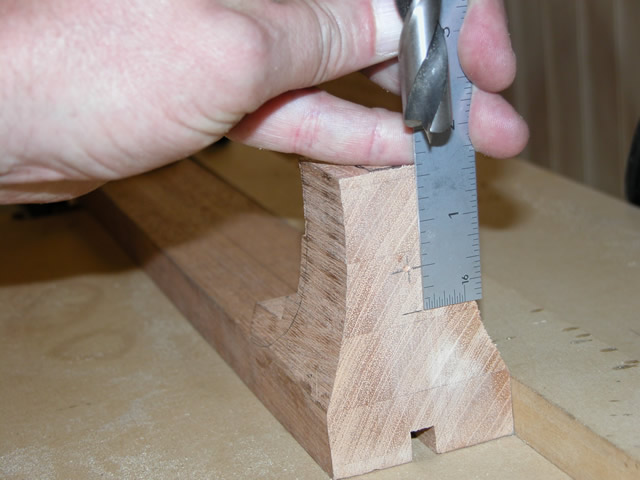 |
| I decided that I would like to keep the dowel wood the same as the heel--mahogany. So, rather than buy a 1/2" hardwood dowel, I turned a 1/2" dowel out of some scrap mahogany that was leftover from my heel block. |  |
| I then epoxied in the dowel. I used epoxy, since it has gap-filling properties, and my dowel was just slightly smaller than the drilled hole. | 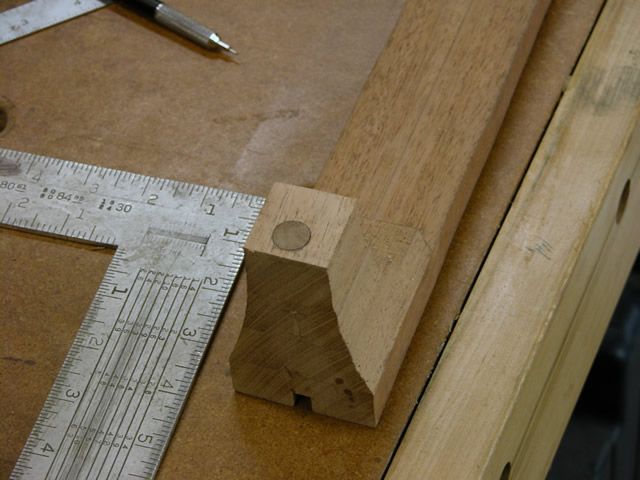 |
| I clamped the neck in place and re-marked the location for the brass threaded insert, by using my 5/16" brad point bit. | 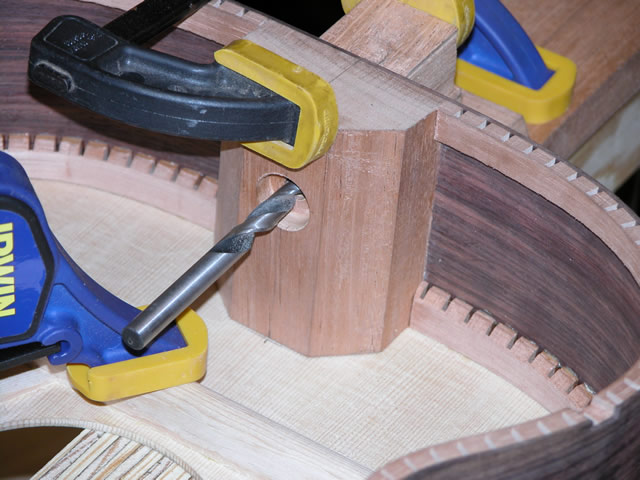 |
| I then drilled the hole for the brass insert. At this stage, though, I made an error that I later had to correct. I drilled the hole slightly angled, rather than perpendicular to the heel surface. Later, when I tried to bolt things together, I had to ream out the bolt hole to accommodate the poor drilling. | 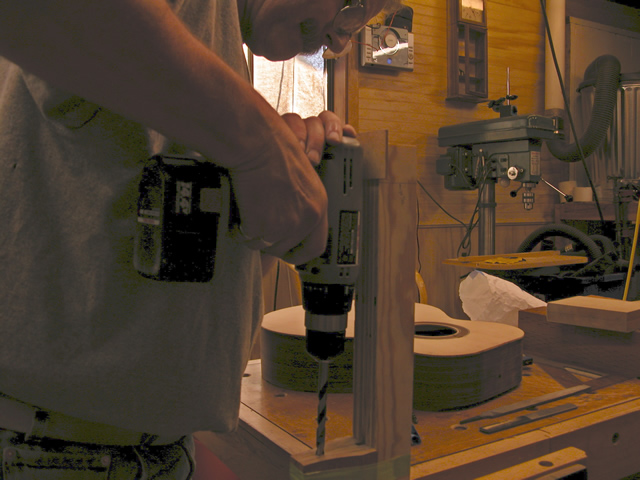 |
| Finally, I used soap to lubricate the threads of the insert, and I screwed the insert into the heel. | 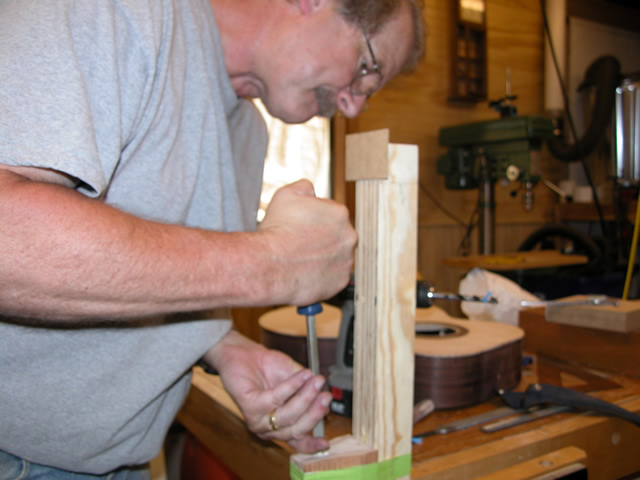 |
| For the first time, I could now bolt the neck to the body. |  |
| Elapsed time for these steps: 5 hours... See the main page for the cumulative time. | |
| Now its time to get the neck in better shape, so that I can glue on the fretboard. I want to do some better shaping of the heel and head, so that I can re-check the fit with the guitar before I glue up. I've used the templates to lay out the curve of the heel, and am removing most of the waste with the bandsaw. |  |
| Next, I begin by chiseling out a close representation of the final curve of the neck near the heel. I don't want to carve the entire neck, so that I have a flat surface for gluing on the fretboard. | 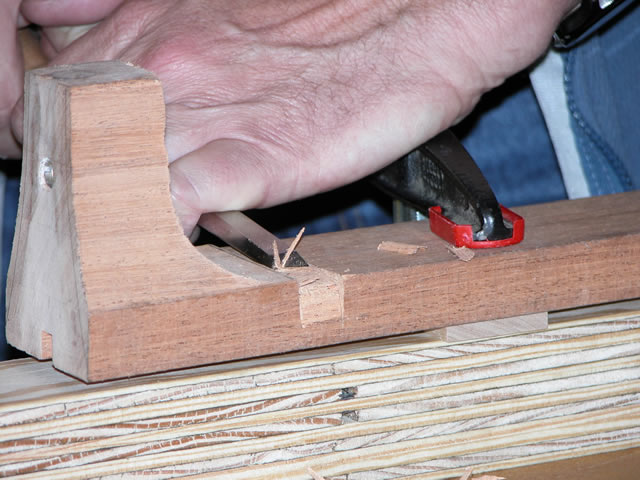 |
| Once I have carved out the neck curve, I can rough in the shape of the heel. I roughed this in with a carving gouge. | 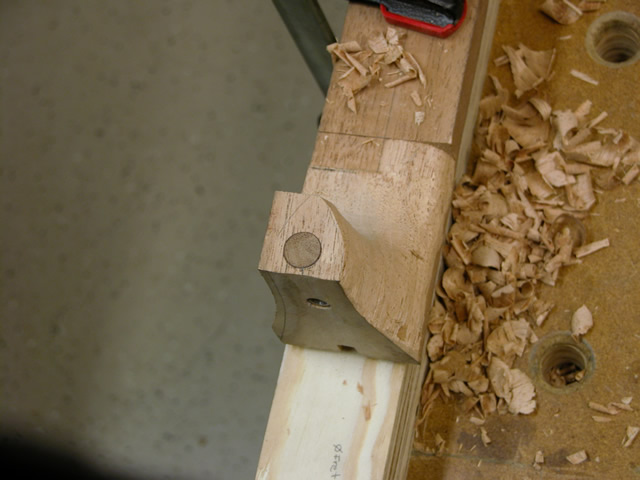 |
| I then attacked the other side of the heel. The heel is now very close to final shape. | 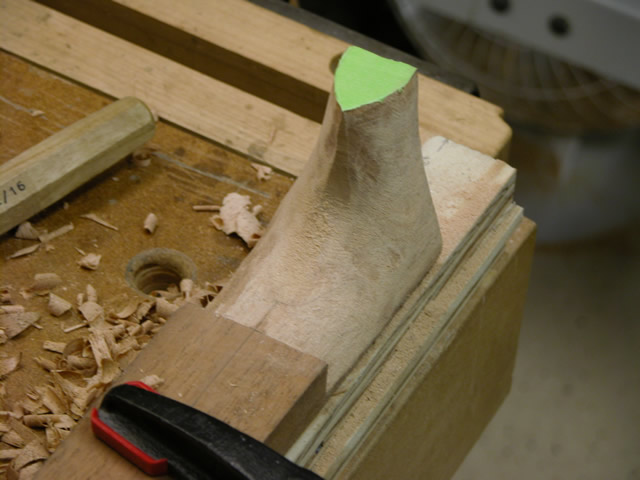 |
| I repeat the same process for the head-neck connection, starting with an approximate curve for the neck. |  |
| Then I again use a carving gouge to rough shape the head-neck connection. | 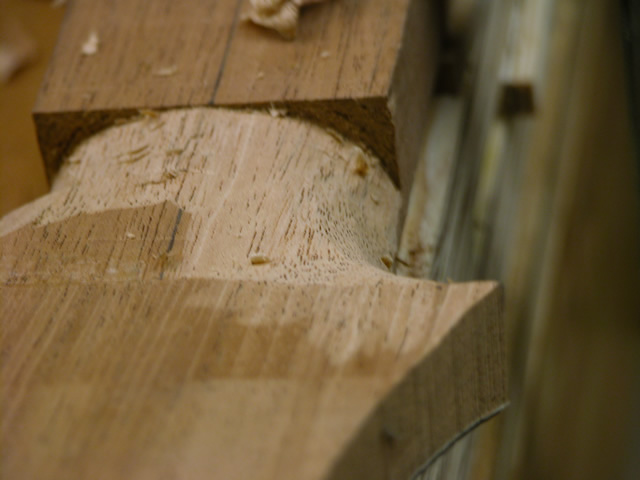 |
| Wow! there really is a guitar neck in that block of wood. | 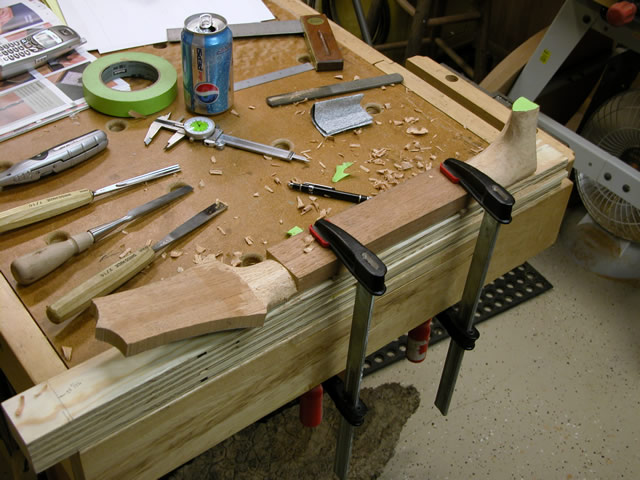 |
| Before I glue up the neck, I want to cut the slot for adjustment of the truss rod and install the truss rod itself. I marked the location of the slot, then drill out the curved end, and used a saw to cut the slot, finishing up the slot with some small chisels. | 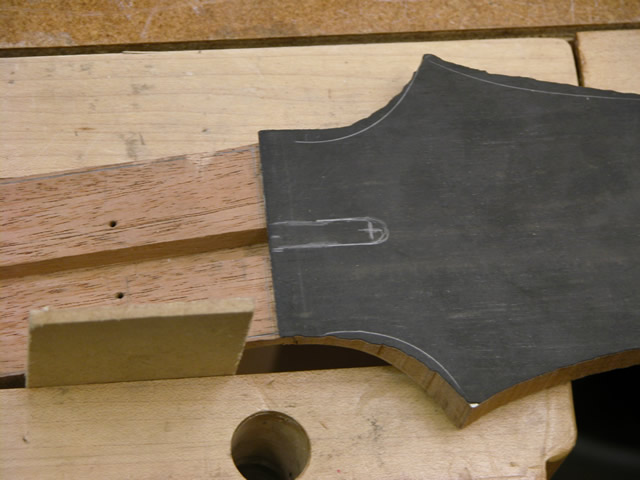 |
| I placed the truss rod in position to check that the Allen wrench will fit properly. Everything looks OK. | 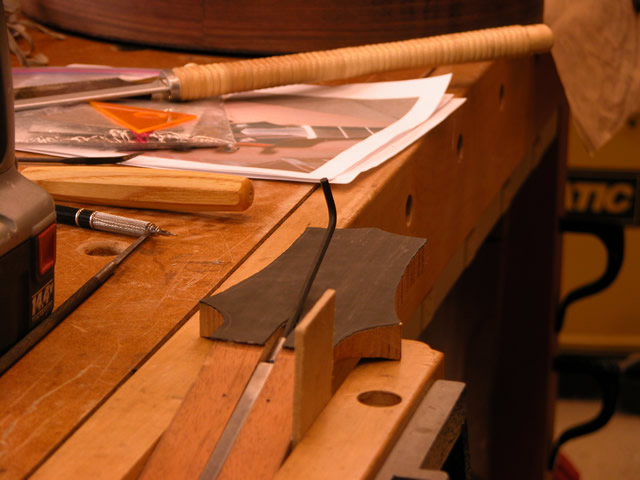 |
| I secured the truss rod in place with some silicon glue, securing the two ends at the nuts of the truss rod. I let this cure overnight. | 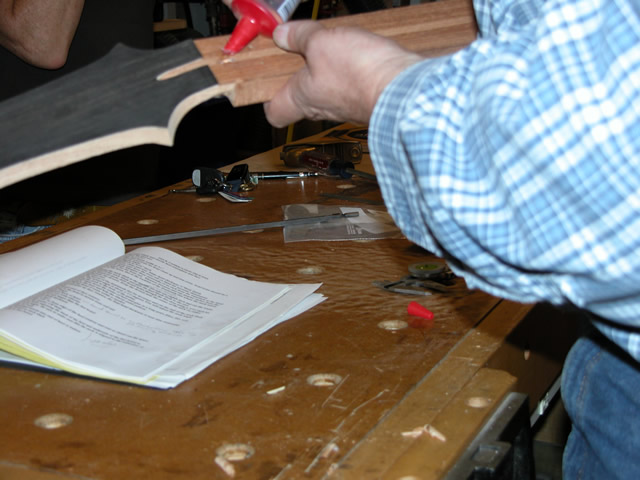 |
| The neck, with truss rod in place, is now ready for installation of the fretboard. | 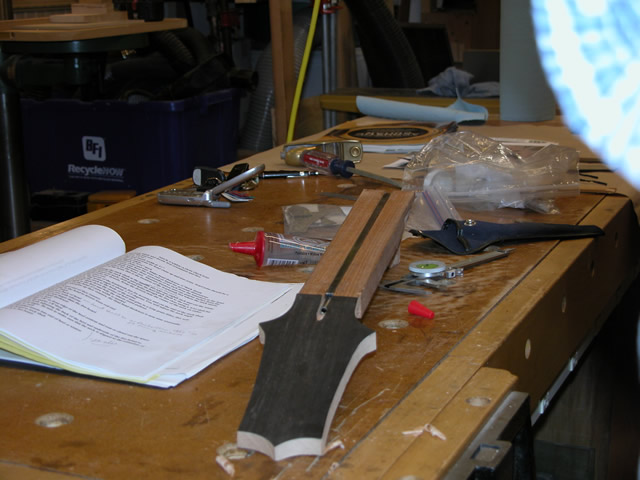 |
| I began installation of the fretboard by gluing the nail dowels that I had made earlier. I used superglue to secure the nails in the holes, the clipped them if to about 1/16" long. I cleaned up any extra superglue so that the surface is flat. This will provide a way to register the fretboard in the right location when I glue it up. | 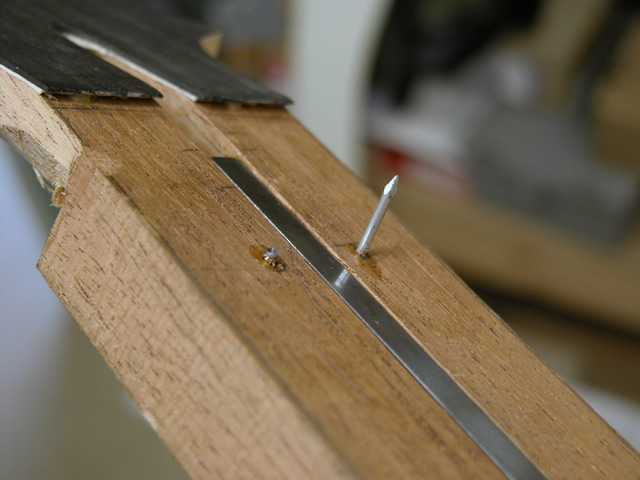 |
| I apply Titebond glue to the neck. This will be the last time that I see the truss rod. | 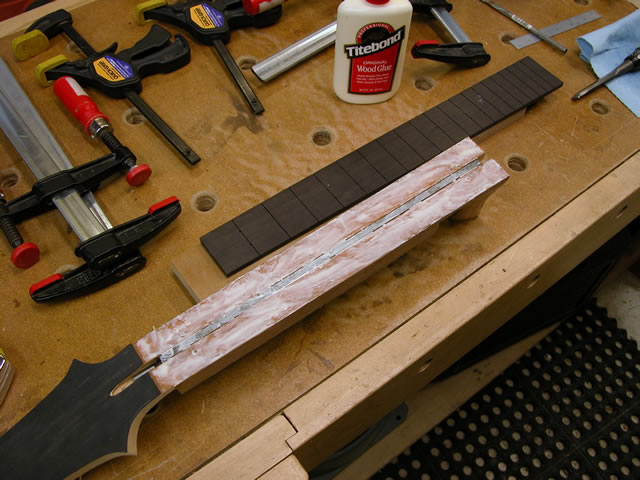 |
| Using a caul to help distribute the force of the clamps, and to avoid damage to the fretboard, I clamp the fretboard in place. | 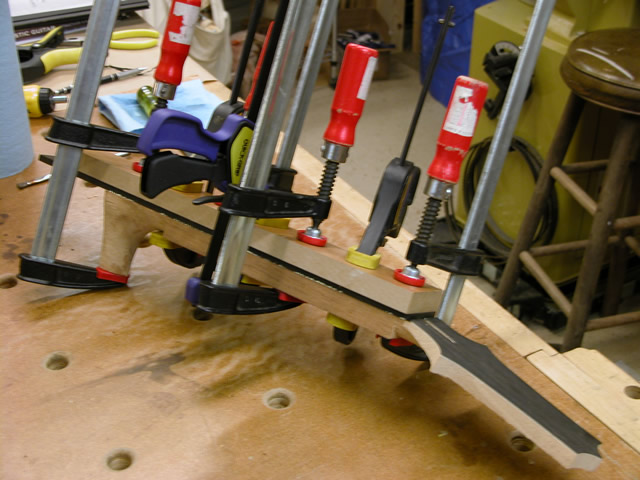 |
| With the fretboard now glued, I need to radius it. I build a template with two radii--14" for the crown at the 19th fret, and 12" for the crown at the 0 fret. | 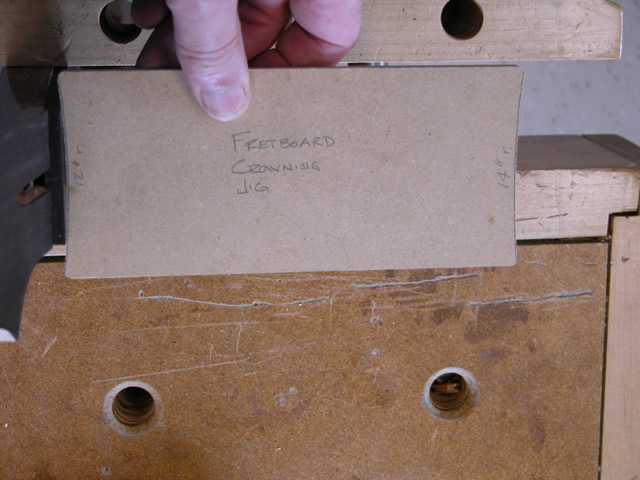 |
| I then begin the process of crowning the fretboard. First, I thin the fretboard by 1/16" from the 0 fret to the soundhole. Then I cut the crown using a plane. As the crown is cut, I deepen the fretslots to avoid losing them (I previously prepared my Stanley keyhole saw to use as a fret saw--described to photos down).. |  |
| The finished, crowned fretboard--cut using the plane, and a sanding block of 120 and 220 grit paper. |  |
| To cut the fret slots, I needed to adjust my Stanley keyhole saw. I made several adjustments. First, I adjusted the kerf of the saw by placing the saw blade between two pieces of steel and then hitting the blade with a hammer. My goal was to reduce the kerf to about .023". Then, I used a triangular file to change the rake angle of the teeth. The teeth of the new saw had a strong forward rake angle, which caused difficult sawing. So, with the triangular file, I filed each tooth to have a slightly negative rake angle. This made the sawing mush easier and reduced my worry of chipping as the saw exited the slot. | 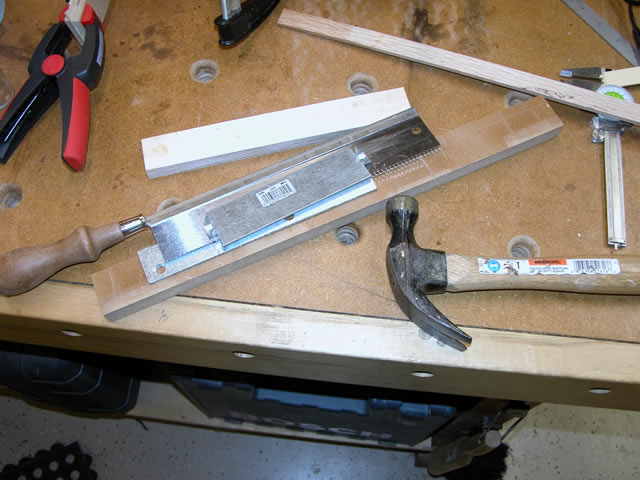 |
| Further, I built a jig to limit the depth of the sawn slot to about 0.10, which is slightly deeper than the depth of the tang on the fret material I purchased from LMI. I had to look on LMI's website to find the exact dimension of the tang depth. |  |
| The jig is simply two pieces of hardboard cut about 1-1/2" long than the saw blade, and put together with a couple of shims on each end so that the saw blade will just pass through, but so that the back of the saw will not. The jig is measured to allow the blade to only be exposed at about 0.010". This will prevent me from overcutting the frets. | 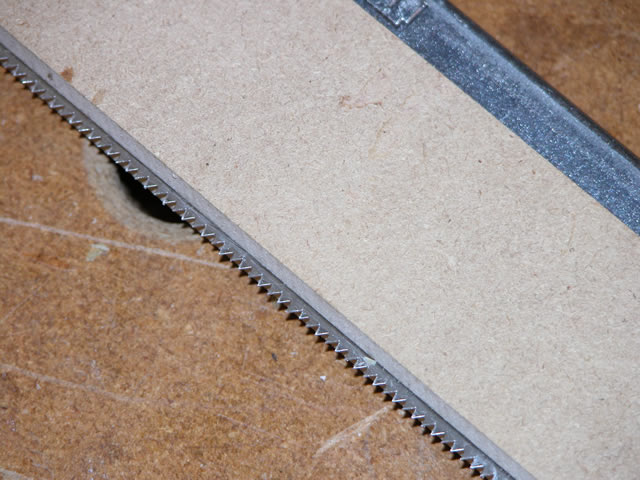 |
| I then use the fretsaw and jig to re-cut the fretslots to depth. I found that the narrow slots would bind easily with the fine ebony dust. I solved this problem by frequently applying wax to the saw blade--which made a great difference. | 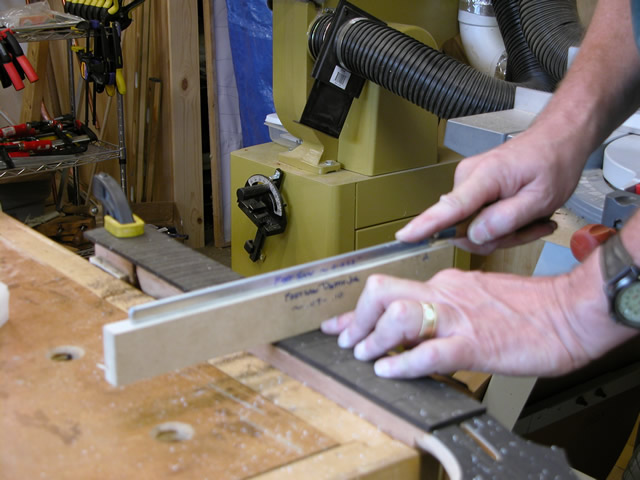 |
| With the fret slots cut, I established a curve for the soundhole end of the fretboard. | 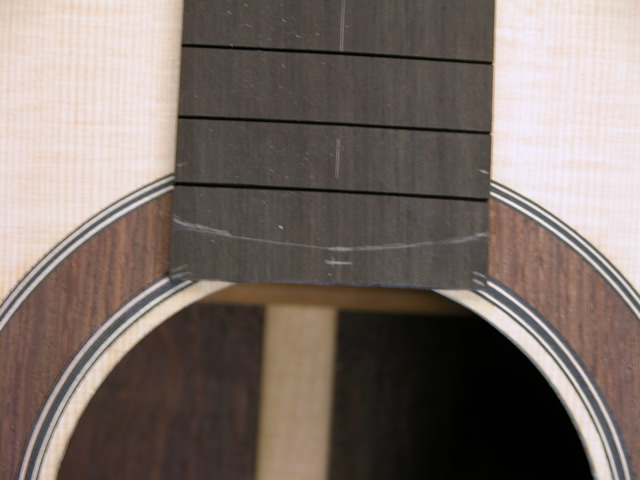 |
| I then clamped the neck and fretboard and sawed the curve, finishing it with a sanding block. There is about 1/16" of soundhole exposed. | 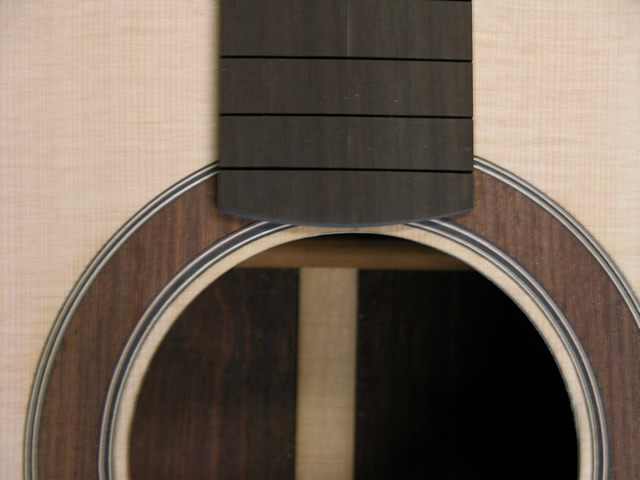 |
| My next task was to do the almost-final shaping of the neck. To accomplish this task, I could have used a chisels and planes, but instead I chose to use my shaving horse. I began by using a draw knife to get the neck to its rough shape. |  |
| I followed the shaping with, in succession--a spoke shave, a file, and 60-100-150-220 grit sand papers. I worked on the shaft first, and then followed with final shaping on the neck and the head. I made the thickness of the neck/fingerboard to be 1" at the 9th fret, and at just under 7/8" at the 1st fret. | 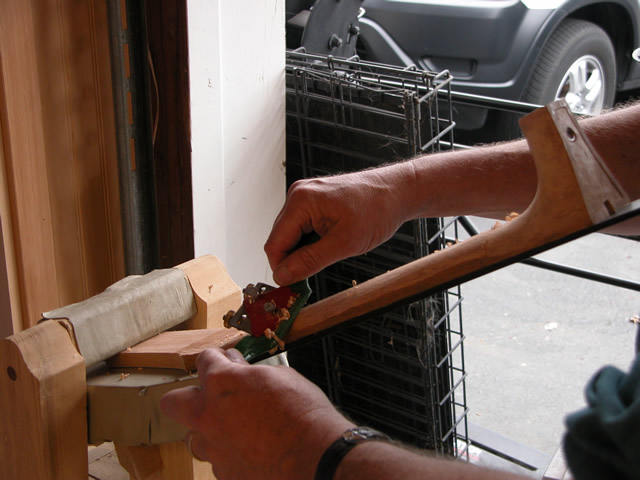 |
| The almost final, shaped neck. |  |
| Here's a shot at the heel. I worked hard to keep a defined line at the apex of the heel, running it as far as I could to the neck shaft. Note that the dowel that I drilled earlier is off-center. Thank goodness this'll be hidden by the heel cap. |  |
| Here's a shot of the head. I kept the ears just slightly tapered. | 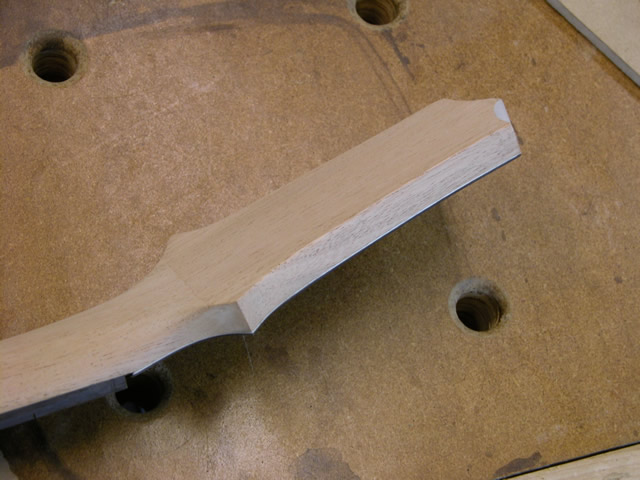 |
| With the neck shaped, I cut the slot for the nut. The nut I received from LMI was 1/4" thick, so I had to sand it down to 3/16". This is very hard material, so I had to use a power sander to reduce its thickness. I marked the cut by placing the nut next to the fretboard, and marking the cut line with a knife. | 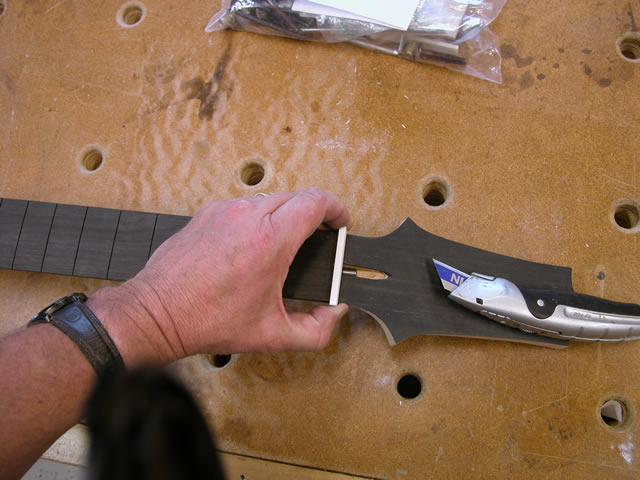 |
| I then used a very-fine toothed backsaw to make the final cut, and cleaned up the channel with a chisel. |  |
| To bore the holes for the tuning machines, I used the template for the head, with lines marked for the locations of the holes. I checked the dimensions on my tuning machines, and determined that the center of the pegholes should be 7/16" of an inch from the edge of the head. This will leave about 1/8" from the edge to the edge of the tuner on the back of the head. I also measured the tuner and determined that I needed a 13/32" hole to accommodate the tuner shaft. After a trip to the hardware store for this odd-sized bit, I was ready for drilling. | 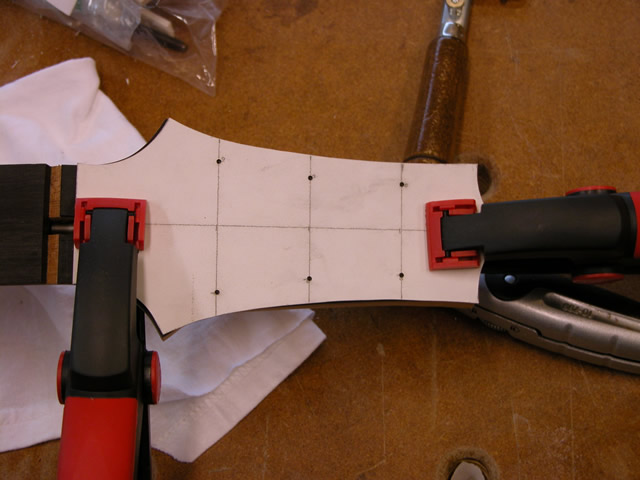 |
| Using a backer to avoid tear-out, I placed the head on a block so that it would lie flat on my drill press table. I then carefully aligned each hole with the bit, and drilled with the brad point bit. | 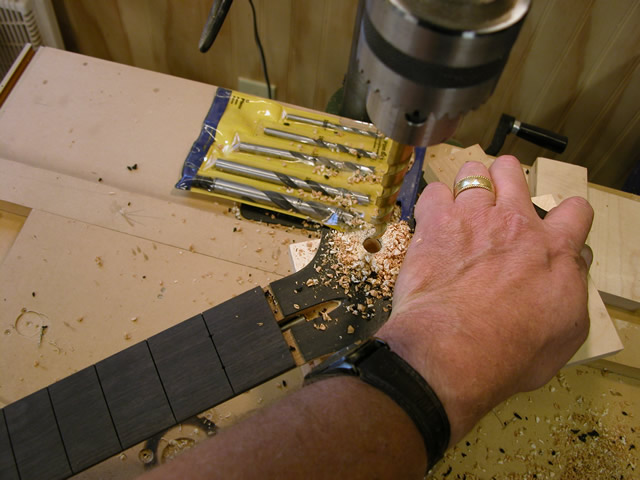 |
| The pegholes came out well. Here, I've temporarily installed one of the tuning machines to make sure that everything fits. So far, so good! | 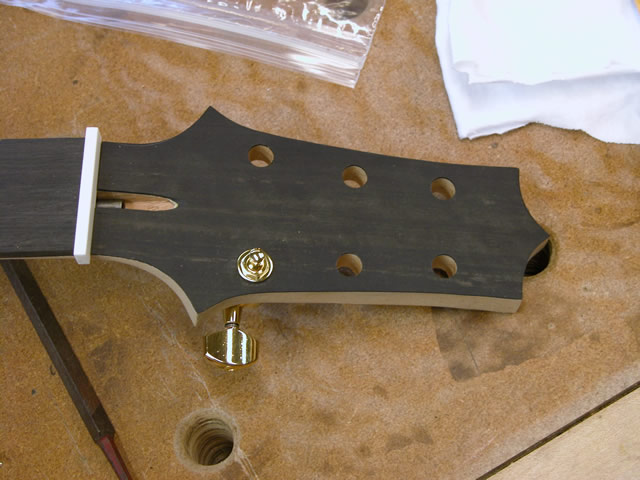 |
| Elapsed time for these steps: 12 hours... See the main page for the cumulative time. | |
| I need to install the dots on the front of the fretboard, however, I'd like to use the drill press to do so, so I need a way of holding the now curved neck horizontal. To solve this problem, I made a "saddle" to hold the neck. I needed to put a curve into a piece of softwood (I used a pine 2x4 piece), so I placed a straight edge (I used my level) on a skew on the table saw, and slowly raised the blade in 1/8" increments until I approximated the curve of the neck. | 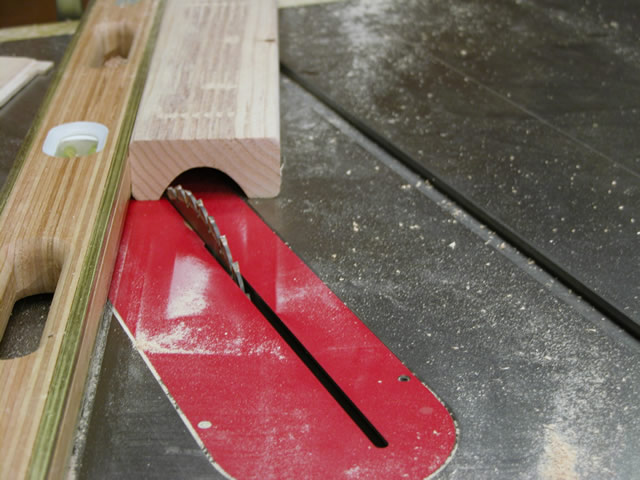 |
| Then, I lined the curve with a thin layer of cork. I then placed the neck into this saddle and went to the drill press to drill the first hole for the Mother of Pearl fretmarker. | 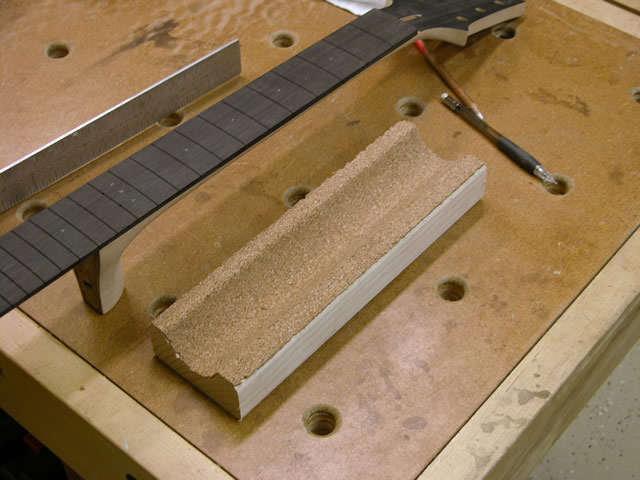 |
| It was very difficult to control the depth of the drill. The first hole I drilled was too deep, so I super-glued a thin wafer of ebony in the bottom of the hole before I placed the dot. I used thick superglue to glue the base of the dot, and once placed, I used thin superglue to lock it in place. I used the same process for each of the dots, ensuring that the Mother of Pearl dots were slightly pround of the fretboard surface. Once glued, I used a combination of files and sandpaper to bring teh dots to the same level as the fretboard. | 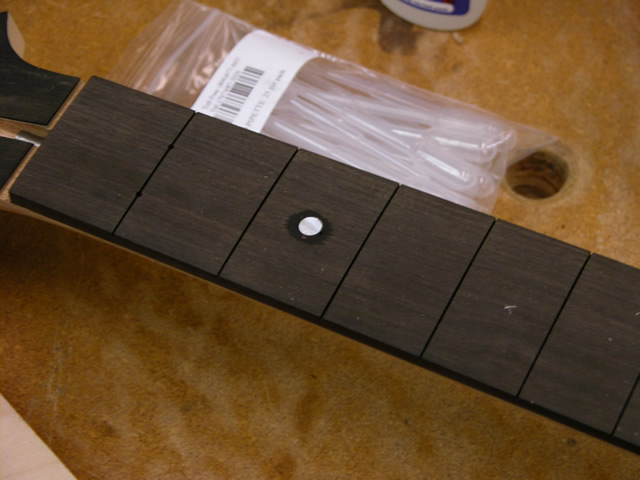 |
| Once I installed all of the dots (one dot each behind the #3, 5, 7, 9 frets, and two behind the 12th fret), the neck had a very finished feel. |  |
| Elapsed time for these steps: 3 hours... See the main page for the cumulative time. | |
| To build the heel cap, I laminated a thin piece of ebony to a piece of curly maple. I carefully made sure that the end of the heel was flat and perpendiculr to the fretaboard, and would be properly positioned in relation to the binding. I used a hardwood caul (shown) to help distribute the clamping pressure. | 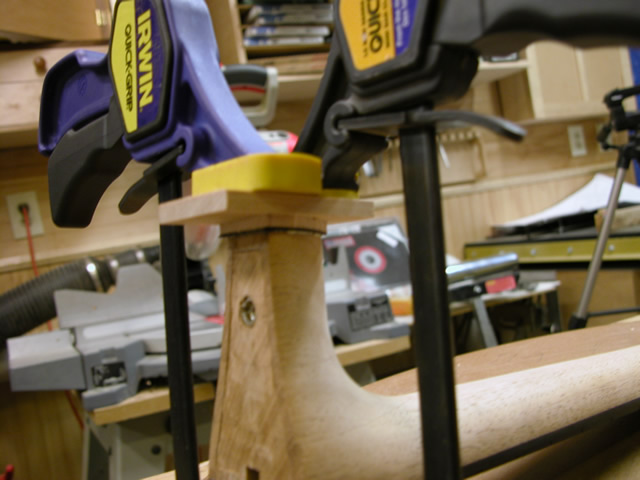 |
| Once the glue had dried, the actial heel cap I assembled was slightly oversized. | 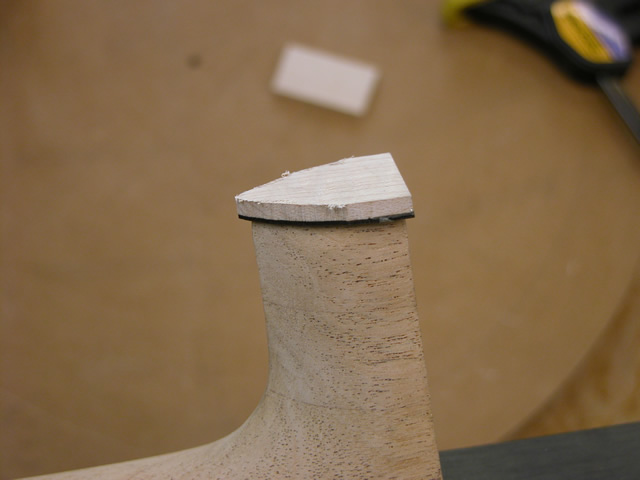 |
| Using my shaving horse to stabilize the situation, I refined the shape of the neck at the heel area. | 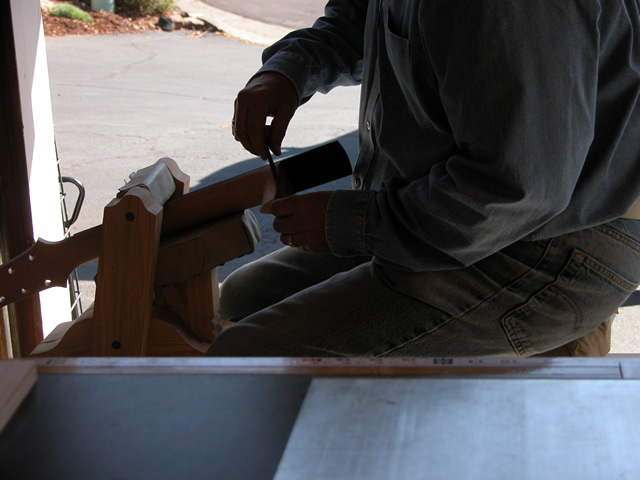 |
| The final neck heel is looking pretty good. Note that I held the heel away from the back of the guitar by about 1/8" or so. | 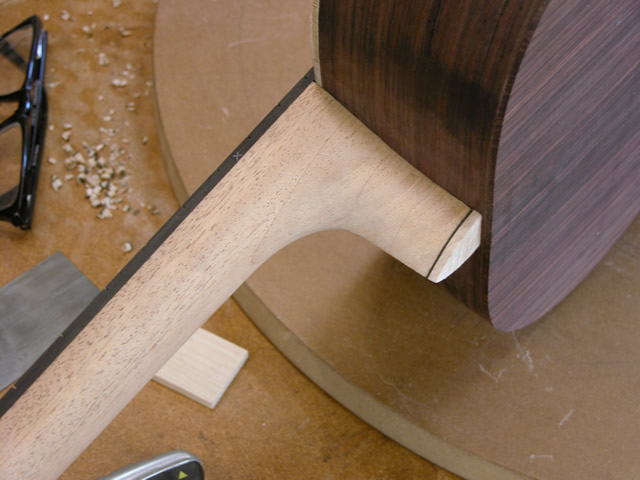 |
| Elapsed time for these steps: 4 hours... See the main page for the cumulative time. | |
| I hadn't installed the side fret-marking dots when I installed the fingerboard fret markers, because the dot stick (a 6" white plastic rod) that I received from LMI was 2mm in diameter. Although there's a fractional bit (3/32") that's very close, when I tested the fit on scrap it felt too tight, so I sent off for a 2mm bit (none were available locally). When I received the bit, I drilled approximately 3/16" deep holes at the same locations of the front dots. I cut small, 1/4" pieces from the dot stick and used needle nose pliers to place the piece into the hole--in which I had put just a small amount of thick superglue (CA glue). Once placed I put a touch of thin superglue over the dot to allow the glue to wick along the length of the dot. |  |
| Once placed. I carefully filed the dots down to the side of the fretboard. The fretboard side will be further filed later, so I didn't spend too much time getting them exact. Here's a shot of the dots after the frets were installed, which I did next... |  |
| Elapsed time for these steps: 2 hours... See the main page for the cumulative time. | |
| I began the process of installing the frets by cutting the individual pieces out with a pair of end-cutters. I purchased a 48" length of fret material from LMI, which came wrapped in a circle. This circle wrapping preserved the curvature of the fret material, which is important so that the frets secure to the fingerboad securely. I laid the material over the fretboard at each fret position, and cut the frets about 1/8" to 1/4" oversize. To keep track of which piece went where, I placed a piece of masking tape, adhesive side up, on the bench and put the fretpieces on it in order. In the photo, the top piece is fret #1. | 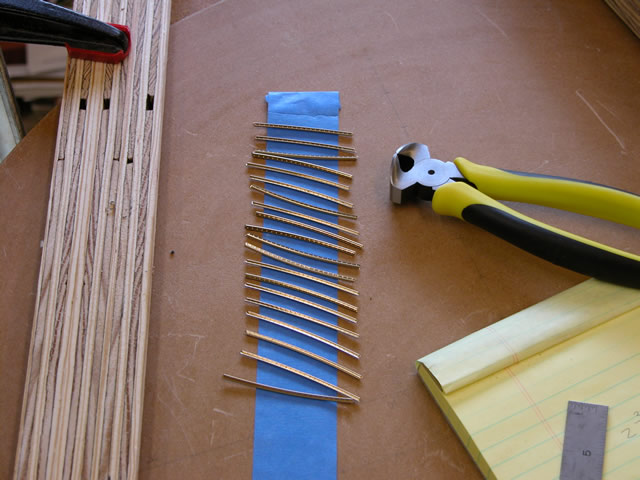 |
| I gathered what I'd need to install the frets, includingsome water, a small glue brush, glue and a brass hammer. I have the neck placed in the caul that I made earlier. Oh--not shown is a wet, folded paper towel. | 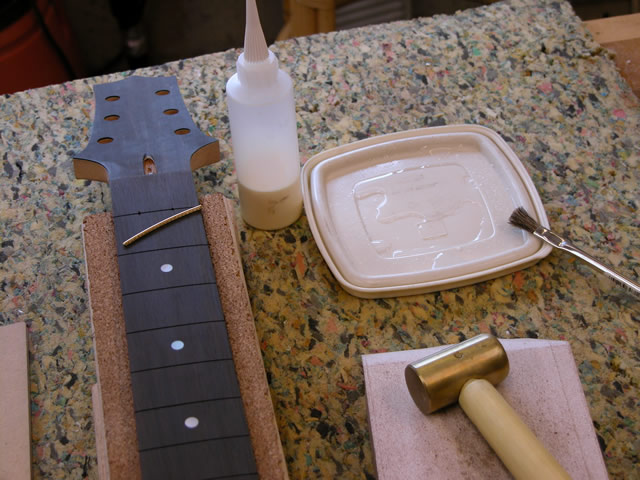 |
| To secure the frets, I used the brush to place a small amount of water into the fret slot, then put three small dots of glue over the slot as shown. As you can see, the glue tended to thin out and run some in the slot, which I wanted. Then using the paper towel, I wiped of the excess and then placed the left end of the fret in the slot and tapped it down with the brass hammer. I then tapped down the opposite end, and proceeded to hammer the fret in by working toward the middle. |  |
| Here are several of the frets installed. As I continued this process, I learned that I was hammering too gently. Initially I was afraind of hurting the frets, but the frets were not being seated fully. With more force, they seated more securely. I was glad that I had built the caul earlier. | 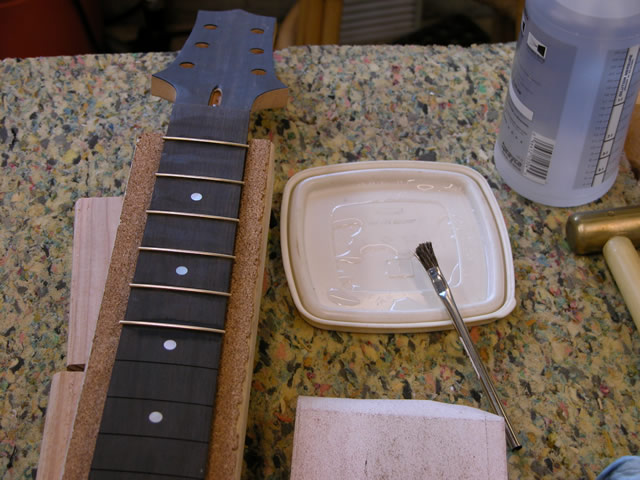 |
| After each fret was installed, I checked to see whether the fret was laying properly in the slot. If not, I went back and re-hammered it until I was satisfied. Also, I learned that the previously installed fret may have loosened a little due to the hammering, so I also checked back a fret or two. | 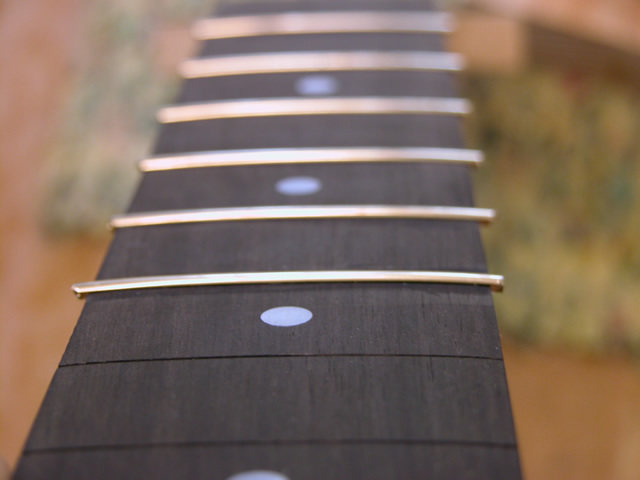 |
| Where the fingerboard was nailed to the neck, there was ample support for the fret hammering. On the body end of the fretboard, however, there needed to be additional support, so I shimmed it underneath with blocks and continued the fret installation. | 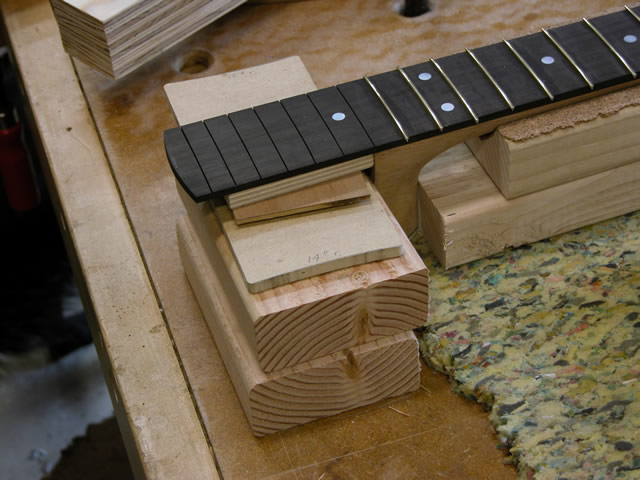 |
| Once installed, the result looked great. Now I'll let it dry overnight and work some on the body before I attach the neck to the body. |  |
| Elapsed time for these steps: 3 hours... See the main page for the cumulative time. | |
| I attached the neck to the bobdy of the guitar and checked the fit. I carefully adjusted the fit between the neck/heel and the guitar body. | 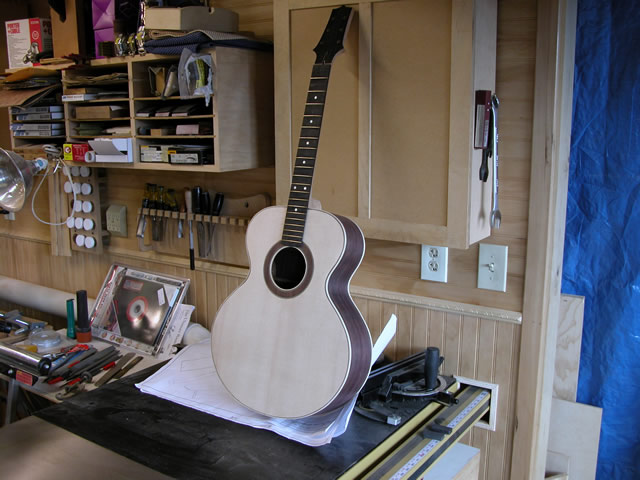 |
| Before I assemble the neck to the body, I decided to do some of the rough fretwork by filing the edges of the frets to about a 35-degree angle, as suggested by Jonathon Kinkead in his "Build Your Own Acoustic Guitar" book. This is the last of the work that I'll do on the neck before attaching it permanently to the body. After it's attached, I'll level and final shape the frets. | 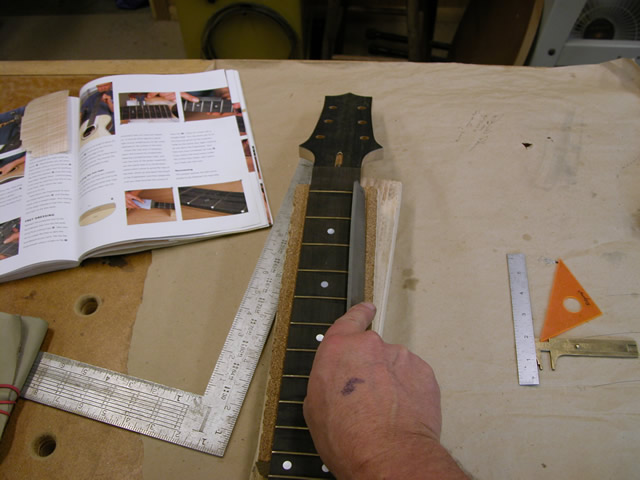 |
| Elapsed time for these steps: 1 hour... See the main page for the cumulative time. |