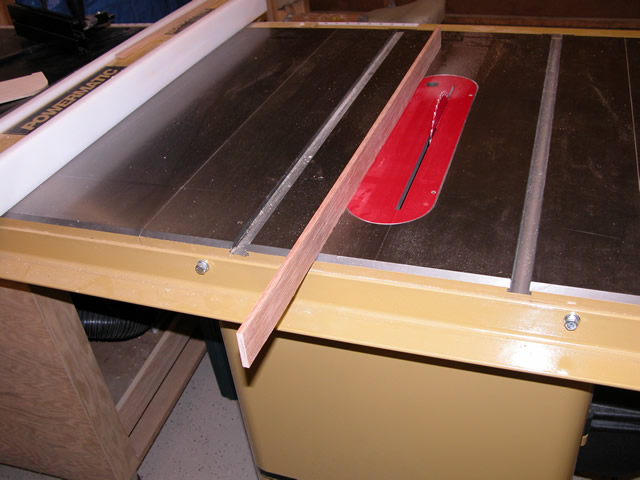
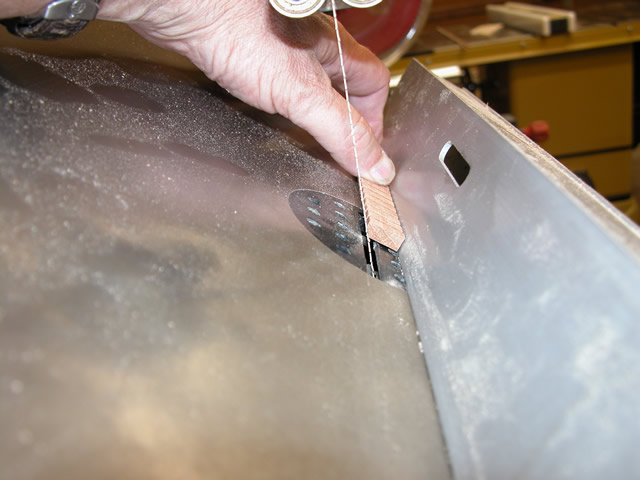
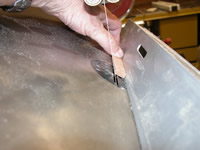
| I started the kerfing by milling two pieces of straight-grained Spanish
cedar, 1/4" thick by 1-1/2" wide, by 33" long. One of these pieces
is shown to the right. I purchased a Freud
Diablo circular saw blade (7-1/4") from a wood supply store (seen
in the photo), and made a test cut. The blade makes a kerf of 1/16",
so I needed a pin in my jig (see the next photo) that
would fit
tight within
the 1/16" kerf. |
 |
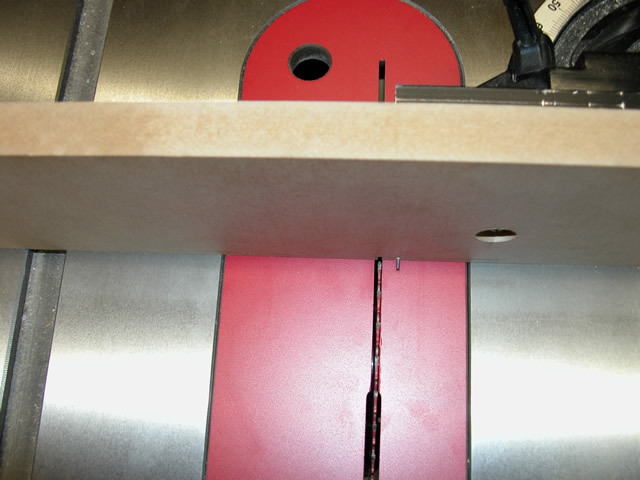
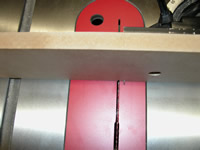
| To build a jig to cut the kerfs, I measured the
thickness of a 3d finish nail and found it to be slightly larger than
1/16". I drilled a 1/16" hole in my jig for the 3d nail;
the final height of the pin cannot be higher than 3/16"--leaving
enough height for the
web of the kerfing to pass over the pin. I then pounded in the nail,
cut it off about 1/4" long, and filed the sides until it measured
exactly 1/16". Finally, I set the dimension between the blade
and the pin to be exactly 1/4", and set the blade to be 7/32" high
(1/32" web). Note that the jig board should
extend a fair amount left and right of the blade, to provide support
for the
kerfing being
cut. |
 |
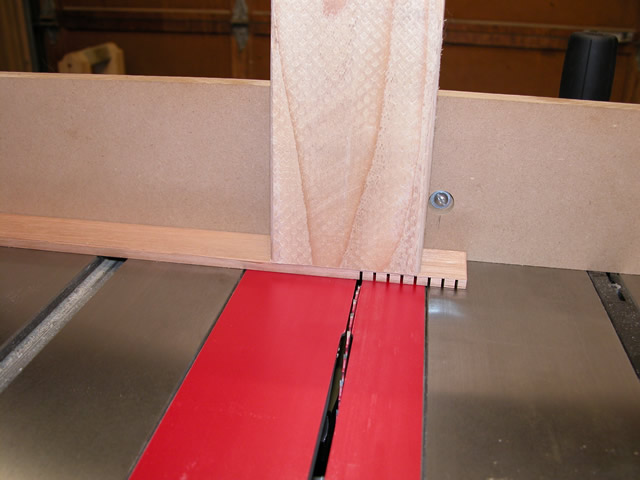
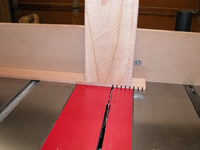
| Now that my jig was set, I started the first cut by placing the end
of my board next to the pin, and then registered the remaining cuts
by placing the most recently-cut kerf over the pin, and making the
next cut. I picked up the kerfing board after each cut to not pass
it back over the blade. The picture shows this process. Note that I
used a short (~6") piece of 2x4 to hold down the kerf board as it passed
over the blade, so that I could get a consistent cut. |
 |
| When I had made all of the kerfing cuts, I then raised my saw blade
and ripped the kerfing piece to exactly 5/8" wide. I could get two
pieces out of each 33" long board. |
 |
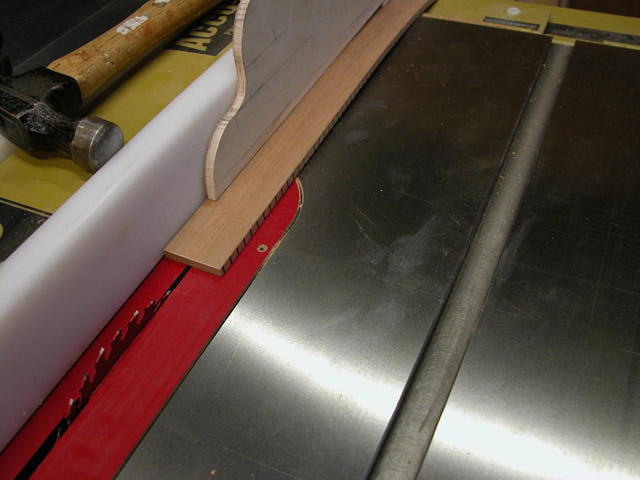
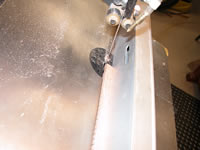
| My next step was to chamfer one side of the kerfing, following the
examples of other kerfing I've seen in books and kerfing I purchased
from LMI. The chamfering that is pictured here shows removing
a small approx. 45 deg.
angle
from opposite
the web (on
the "toothed" side). This creates regular kerfing. If reverse
kerfing is desired, the chamfer occurs on the web side. (The cut shown
was an accident--I wanted reverse kerfing, so I had to re-fabricate
some more kerfing for
my guitar.) |
 |
| This picture shows the orientation of the kerfing to chamfer the
web, producing "reversed" kerfing. I produced this cut by
tilting my band saw table. |
 |
| Elapsed time for these steps: 3 hours... See
the main page for the cumulative time. |
|