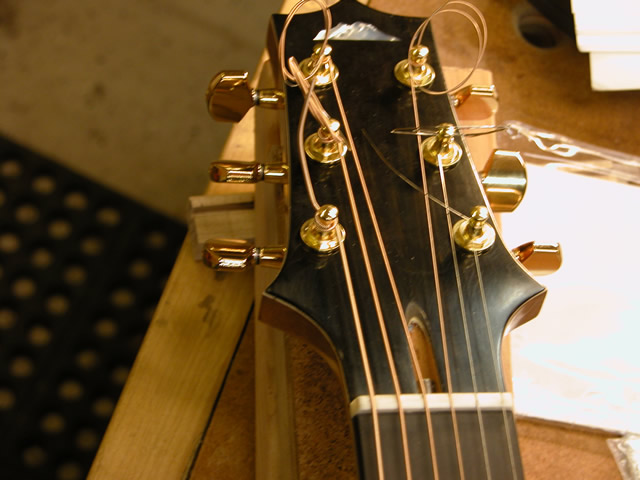
| With the guitar strung, I have begun the setting up--establishing
the proper action for playing the guitar. This essentially is the
process of setting the string heights above the frets so that the
distance between fret and string is as small as possible, which improves
playability. At the same time, the distance between string and fret
must be large enough to avoid the string buzzing, or hitting the
fret as it vibrates when struck. |
 |
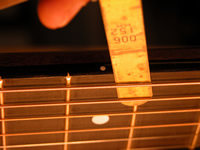
| The first setting is to determine the neck relief (or camber).
I did this by placing a capo on the first and twelfth frets and adjusted
until there was a small gap of about .01" between string and
fret at the 6th fret. I used feeler gauges to establish the gaps. |
 |
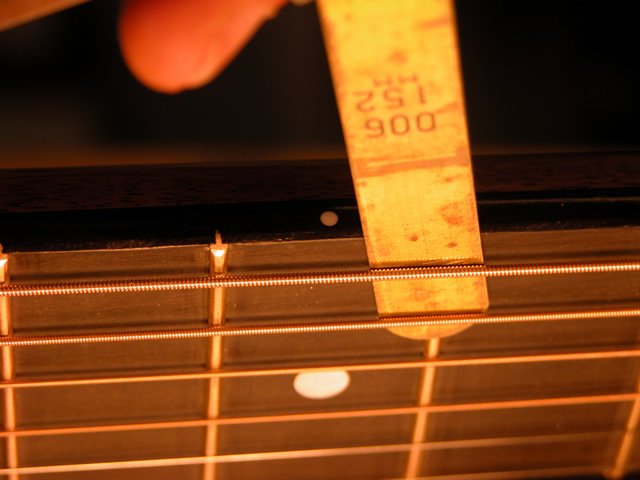
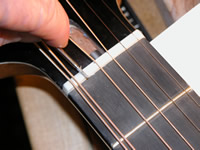
| Once the neck relief was established, I worked on the establishing
the proper string height at the nut. I held each string down in succession
just beyond the second fret and ensured that there was a slight gap
between the first fret and the string. I generally kept the gap at
about .008". |
 |
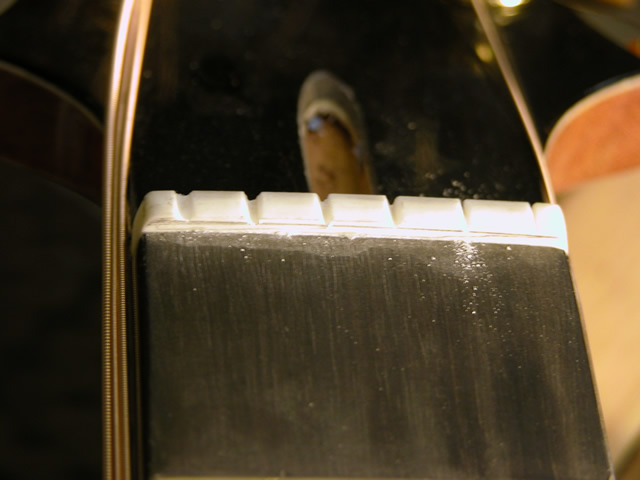
| Once the nut heights were established, I shaped each string slot
to fit the width of the string and to ensure that the strings would
pull smoothly through the slots when tuning. |
 |
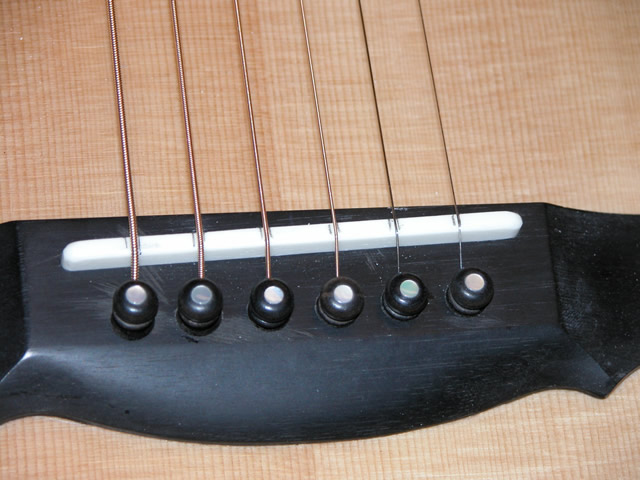
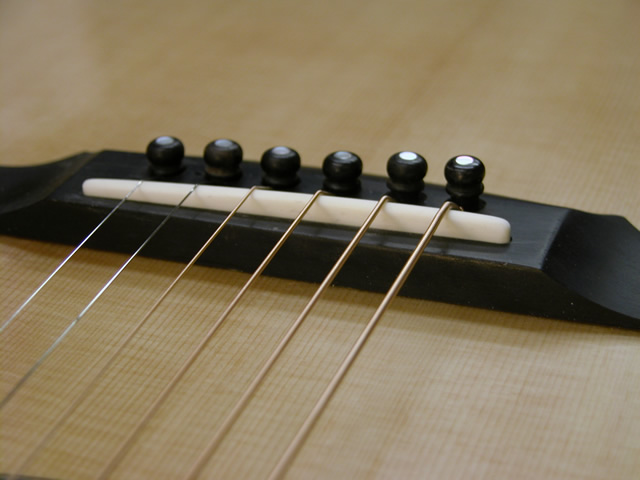
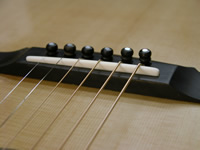
| With the neck relief and nut slots tuned, I began work on the saddle.
First. I marked the location of each string on the top of the saddle,
and then I measured the gap between the string and the twelfth fret
(which is located at exactly one-half the distance between the nut
and the bridge). I developed a table that told me how high each string
was, assuming a target gap for the low 'E' string should
be .125" and for the high 'E' string should be .09" and should vary
proportionately
in between. |
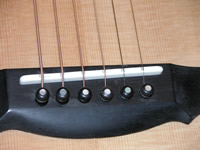 |
| The difference between my target and the actual gap told me how
low I must lower the string at the twelfth fret. Double this amount
is what need to be removed from the bridge. I marked the amount to
be removed at each string, and filed the bridge down. The result
is as shown here. The guitar plays very well now. |
 |
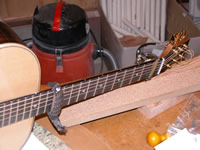
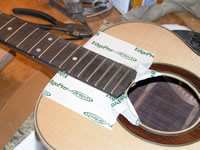
| Even though the guitar is now playable, some final details need
to be attended to to fully complete the guitar--touching up finish
flaws, putting in a label, improving on the polish, covering the
neck truss rod hole, and installing a scratch plate. Here, I have
masked off the guitar around the neck to allow me to hand brush some
lacquer onto the side of the fingerboard, where the lacquer broke
after I removed the tape that protected the fingerboard when I sprayed
the guitar. |
 |
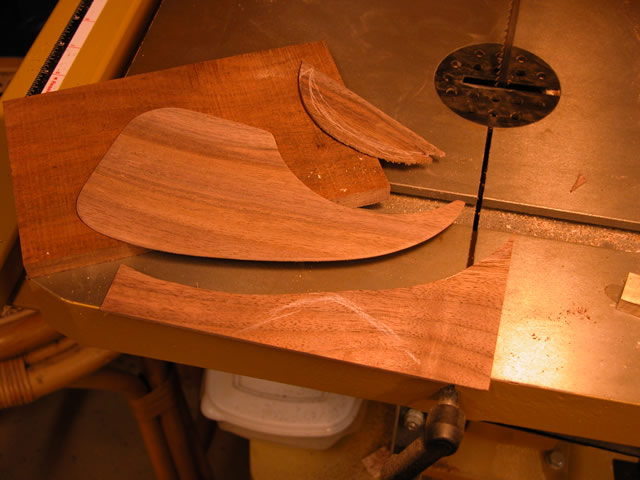
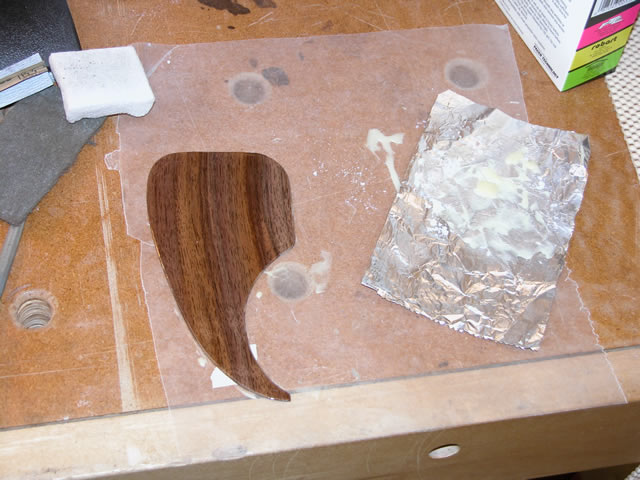
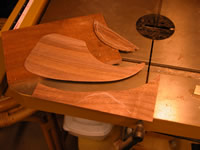
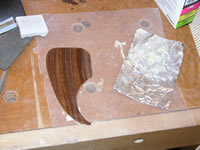
| I purchased a plastic pickguard (scratch plate), and I'll use that
plastic plate temporarily. However, I decided to try my hand at making
a wooden scratch plate. I resawed a piece of Black Walnut to about
1/16" thick, and established and cut a pickguard shape out of the
resawn piece. |
 |
| I began finishing the plate by first using a vinyl sealer and then
three coats of epoxy filler to fill pore holes. |
 |
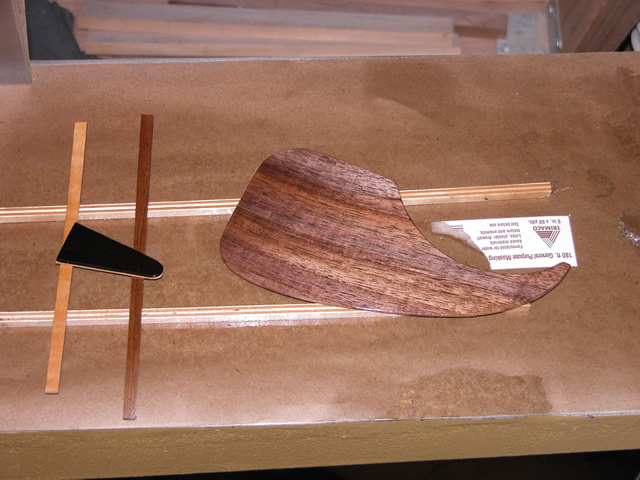
| Then, I sprayed lacquer on the pick guard and the truss rod hole
cover. To avoid getting out all of the large spray equipment, I chose
to just use aerosol cans of Deft Clear Lacquer. I sprayed six layers
of lacquer on each, let those layer dry overnight, sanded the pieces
flat, and repeated the process. |
 |
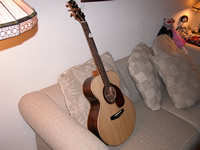
| While the lacquer was drying, I unstrung the guitar and repolished
it. This time, instead of hand polishing, I used polishing wheels
and Menzerna compounds (very fine and finest). The polish that resulted
was far superior to the polish I had acheived by hand. Here's a front
view demonstrating the final polish. Note the temporary pick guard. |
 |
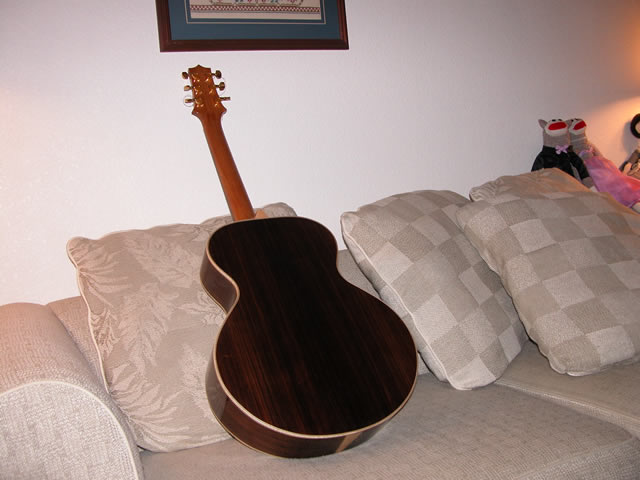
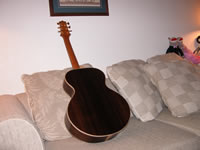
| ...and heres a back view of the polished guitar. Well, it's now
time to take a break for Christmas. After I return from my Christmas
trip to Colorado, I'll polish up the truss rod hole cover and pick
guard and install them on the guitar. My goal was to complete the
guitar before Christmas, and I feel that I've done exactly that.
The few minor pieces that are left don't spoil the wonderful feel
and tone that come from this instrument. |
 |
| Elapsed time for these steps:
5 hours... See the main page for the
cumulative time. |
|