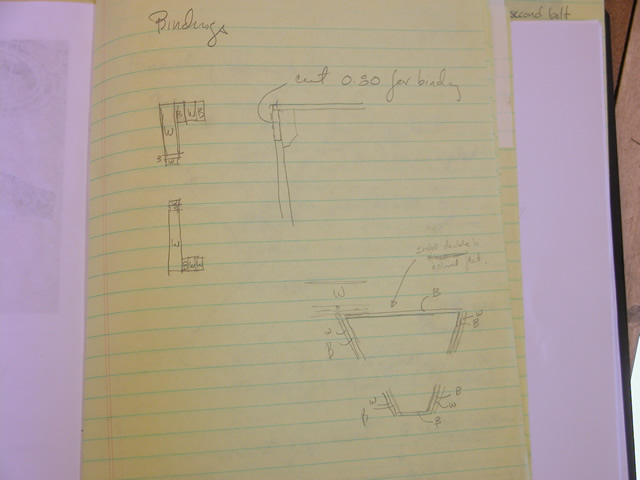
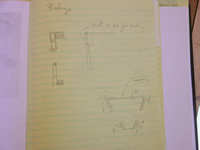
| I had developed a binding/purfling scheme with Dan Biasca--placing
differing colors next to each other. Further, I designed a purfling
scheme for the end flash (more below). |
 |
| To start, I placed the curly maple bindings on the bench, all four
together with one side up and using a scraper, smoothed the sides
for gluing the purflings. I then, one binding at a time, applied
glue, then... |
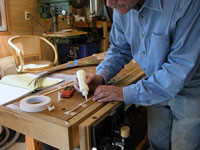 |
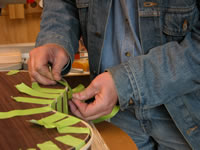
| Carefully placed the purfling on the gluey binding. I made sure
that the purfling was flush with at least one edge. Once the black
purfling was in place, I applied more glue and placed the white purfling.
These are the purflings that will be exposed on the sides of the
guitar. I then wiped excess glue off of the bindings. |
 |
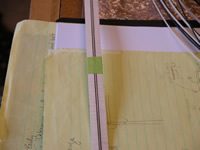
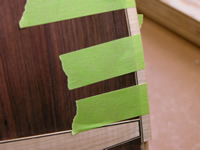
| When I had glued the purflings on the bindings, I taped the bindings
together in pairs as shown. This does two things--first, it helps
the combination keep from bending due to the glue moisture, and second,
it puts the pairs in the right configuration to bend a left-right
pair. |
 |
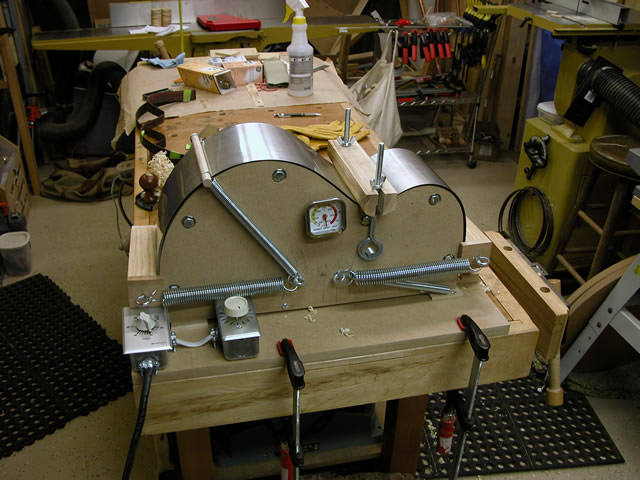
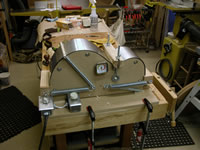
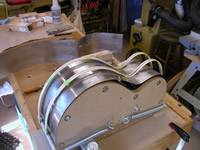
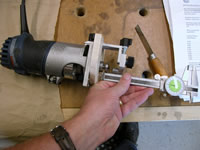
| I considered the methods for bending the bindings. I could have
used a pipe/propane torch combination, an electric iron, or a bending
machine. After some questionable experience with the pipe/propane
torch (my sides scorched badly), I decided to build a bending machine,
which you see here. I used the photo of a similar machime on the
LMI website as the model. All together, and using new hardware, I
spent about $80 and 8 hours of time to build this. A new machine
would have cost around $500. I used a timer and dimmer to control
heat--provided by a 300W and 200W bulb combination. |
 |
| Before I placed the bindings in the bending machine, I throughly
wet them. This proved to be a mistake, as you'll see below. However,
the bending machine worked well and I had two sets of bindings in
roughly the correct shape for the guitar. |
 |
| After pulling the bindings from the machine (I heated them for
1/2 hour and left to cool overnight), I removed the tape from the
bindings. It wasn't difficult to remove the tape, even though it
had "cooked" in the machine. |
 |
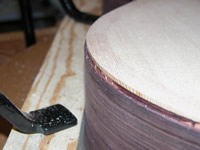
| When I looked closely at the bent bidings, I discovered that the
purflings had delaminated in several places. I searched the web and
found out that the likely cause was my wetting of the bindings before
bending. |
 |
| I cleaned out most of the dried glue from the gap between the delaminated
purfling and bindings, and then re-applied glue and clamped. I needed
to do this in about 10 places. Next time, I won't wet the bindings.
They repair worked well. |
 |
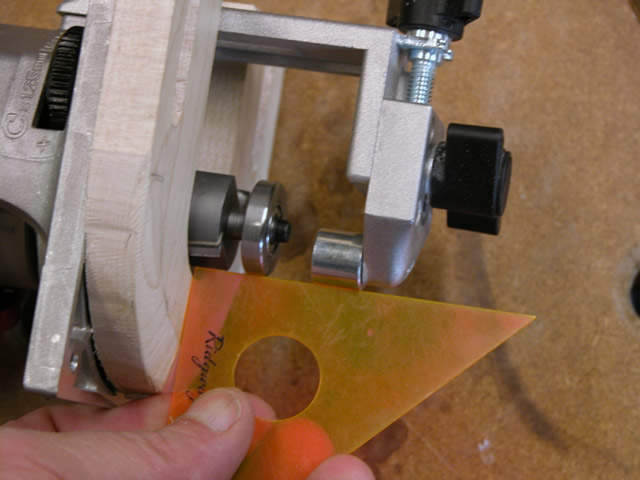
| Now for the scary part--I need to cut the channel for the binding
and top/bottom purflings. To do so, I had purchased a router bit
set from LMI, which is specifically designed to cut a 0.80 " rabett
for the binding and 0.140 for the purflings. I carefully set the
bit depth... |
 |
| ...And then I set the roller so that I could have the router ride
against the side of the body. |
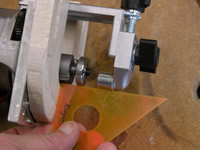 |
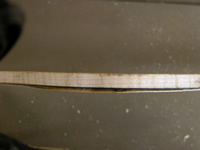
| I made a test cut on a scrap of wood and checked it with a small
piece of the binding. Looks OK so far. |
 |
| Since the ourter will register against the side of the guitar,
I carefully scraped the sides to their close-to-final condition. |
 |
| Then, I made my cut, ensuring that I cut "with" the grain, requiring
four separate passes on the top and four on the bottom. I had to
carefully ensure that the router did not tip toward the center of
the guitar. The result is the channel that you see here. I cut the
binding channel first and the purfling rabbett second. Next time,
I think that I'll cut the purfling channel first. I think that will
give me a better result. |
 |
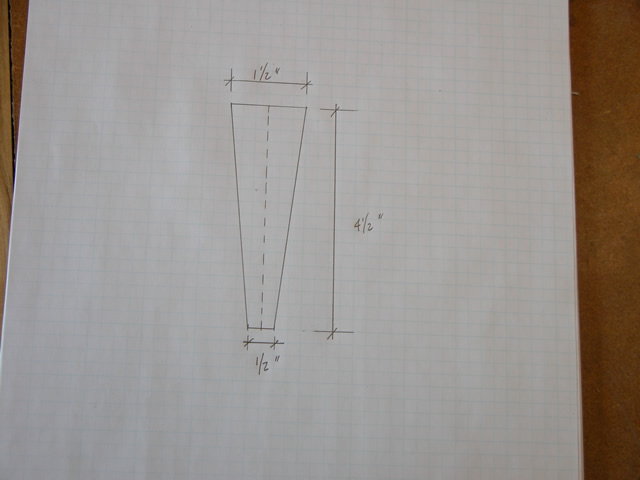
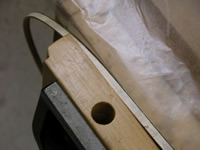
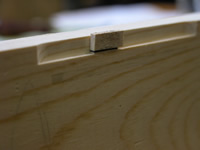
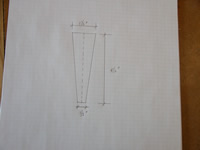
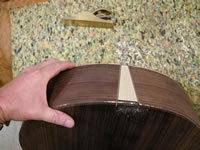
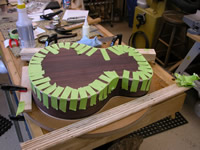
| Once the bing channels were cut, I could install the end flash.
I designed the end flash shown, and cut a formica template in this
shape. |
 |
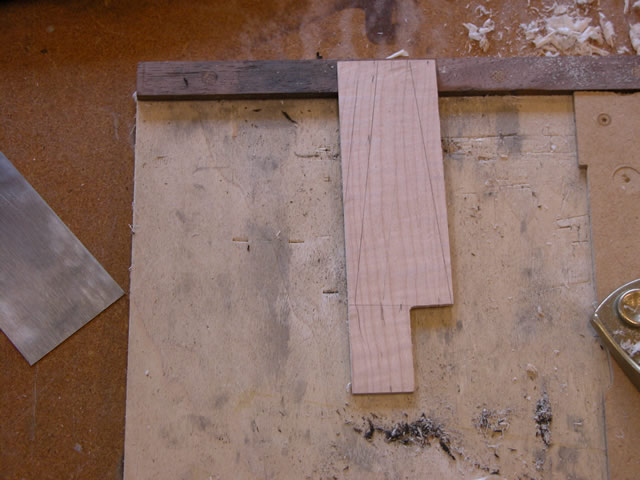
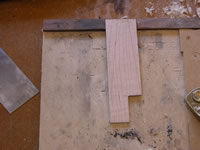
| I used the template to cut the flash shape from some scrap curly
maple that I had. I thicknessed it down to about 0.90. |
 |
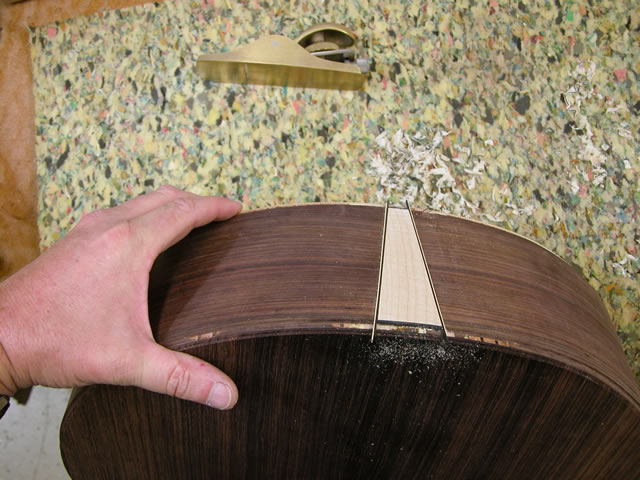
| Then, I laid out the flash on the end of the guitar with a knife
and cut it out with a chisel, down to the end block. I carefully
ensured that this area was flat, so that the flash would glue properly. |
 |
| Referring to my plan, I placed black/white bindings on the sides
of the flash, and then put in place. When in place, I could mark
where
it
need to be trimmed for the top and bottom bindings, and I cut just
short of this mark so that I could place single black bindings on
the ends. This should create a great pattern. |
|
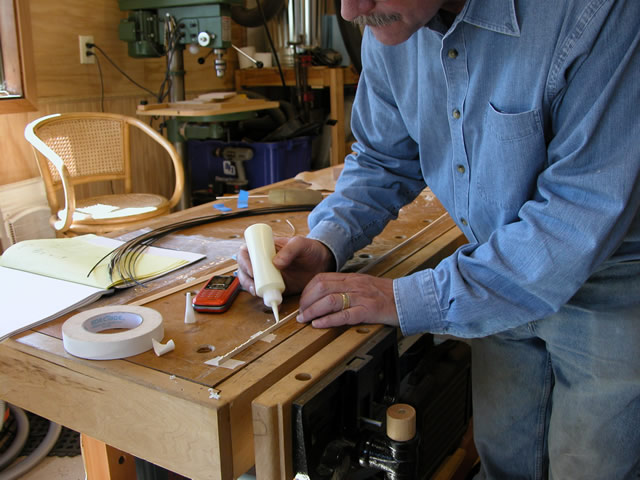
| Then I glued the end flash in place. This is the last step before
installing the bindings. |
 |
| Elapsed time for these steps: 8 hours...
See the main page for the cumulative
time. |
|
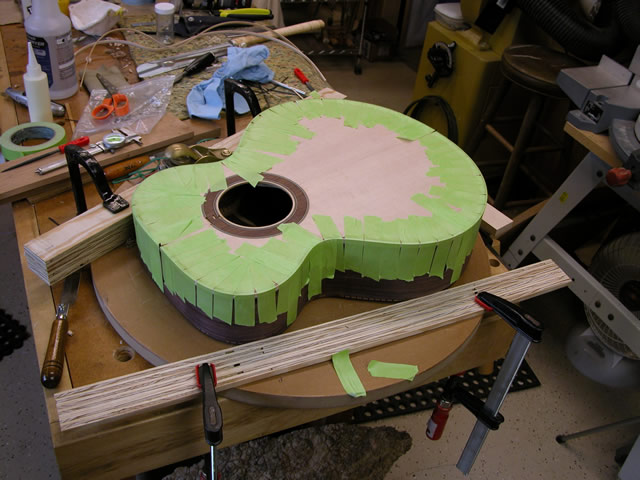
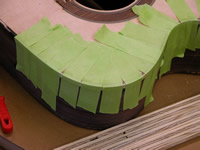
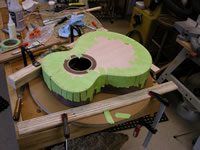
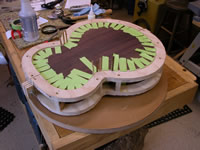
| The day after I installed the end flash, I decided it was time
to put the top bindings in place. I wish I'd started with the back,
but I didn't have the right purflings. Why did I wish I'd started
at the back? You'll see. Here, I've temporarily taped the bindings
to trim the first binding at the ends. |
 |
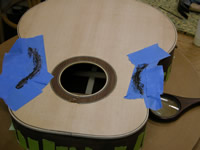
| I began by putting glue all along the binding/purfling channel
(a mistake) and then, starting at the waist, I used tape to pull
the purfings/binding in place. Here you can see one side taped up.
My visitors were glad to come and visit. They haven't seen me for
awhile. Note that I had taped the bindings all along. This prevented
me from seeing a problem that showed up later... |
 |
| Here's a little more detail at the small bout. Note that I have
used a system to immobilize the body while I applied the tape. This
turned out to be a great idea, since I need to put on a fair amount
of force to pull the tape taut. |
 |
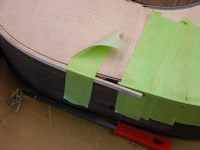
| Before I set the second side of the binding, I temporarily taped
it to trim the bindings and purflings. I found that the purflings
were best trimmed as the bing was installed. It was pretty difficult
to juggle purflings and bindings and tape and glue all at once. I
used a much better method on the back. |
 |
| Finally, everything is glued in place, and I'll leave it overnight
to dry. |
 |
| When I remove the tape, I discovered that the bindings had pulled
away from the waist. I needed to correct this condition by cleaning
out the gaps and putting in epoxy that I mixed with ebony dust. I
attribute this situation to not enough pressure on the tape. I didn't
detect the problem because I had taped the entire area. |
 |
| Elapsed time for these steps: 10 hours (not
including building the bending jig)... See the main
page for
the cumulative time. |
|
| I had to order some additional purflings for the back, so I had
a week to consider the problems I had with the top bindings. I decided
to use a different technique, which you'll see below. It was much
more successful. Here, you can see that I'll install a b/w/w combination
of purflings that will be visible from the back. |
|
| I decided to sequence the binding/purfling installation as follows:
First, I'll install the bindings and tape them as needed to hold
them in place. Then, I'll install the binding. I also decided that
I should apply glue to the entire channel at once; rather. I applied
glue in about 6" strips. Here, you see where I am testing the purfling
installation at t he end to make sure the purfling channel is properly
cut. |
 |
| Starting at the waist, I glued on the purflings strips, applying
tape as necessary. Here, one side of purflings are glued in place
and I'm ready to immediately start installation of the binding. |
 |
| I prepared sets of doubled-up tape for pulling the bindg in place.
This allowed me to apply much more force in pulling the binding in
place. I started at the waist and put only as much glue in place
as I could cover with about five pieces of tape. Additionally, I
left space between the pieces of tape so that I could detect whether
and binding areas were pulling away from the body. Here, you see
me applying tape to the binding by starting t he tape at an angle
and applying force both across and down. This process worked very
well and was much less stressful than the procedure I had used on
the top. |
 |
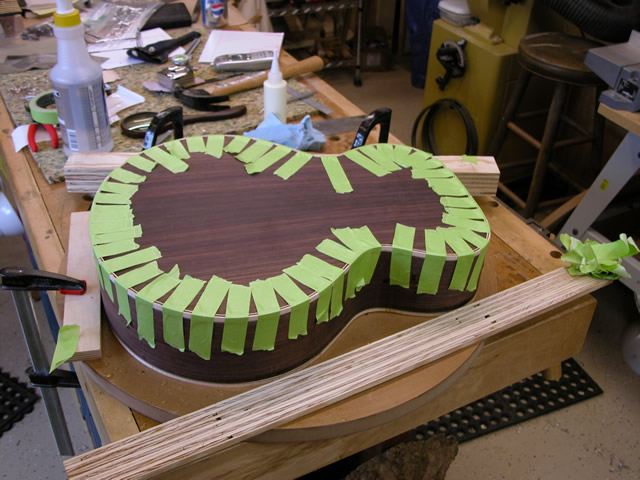
| The completed binding glue-up on the bottom. It went faster and
worked much better than on the top. |
 |
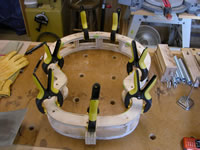
| Finally, to unsure that the critical waist area remained tight,
I placed the glue-up in the mold and used small shims to apply additional
pressure at the waist. The result was a very nice glue-up. This is
the method I'll use next time. |
 |
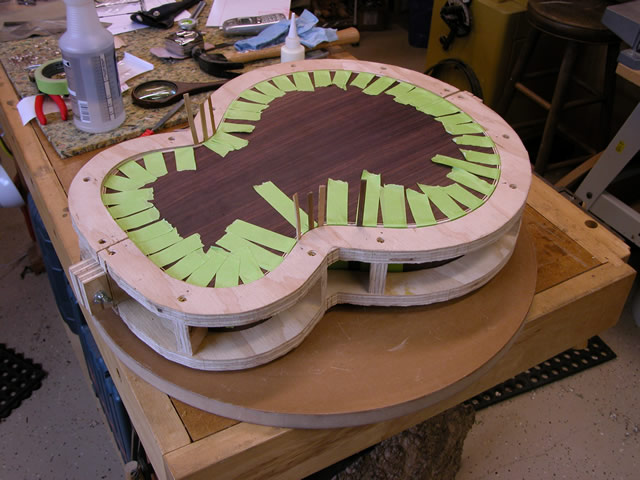
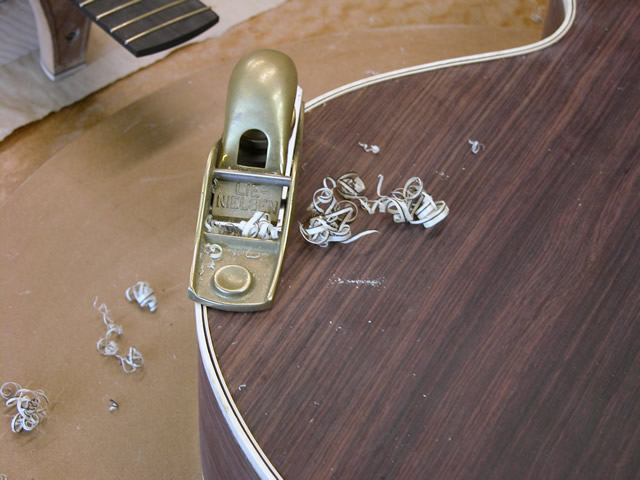
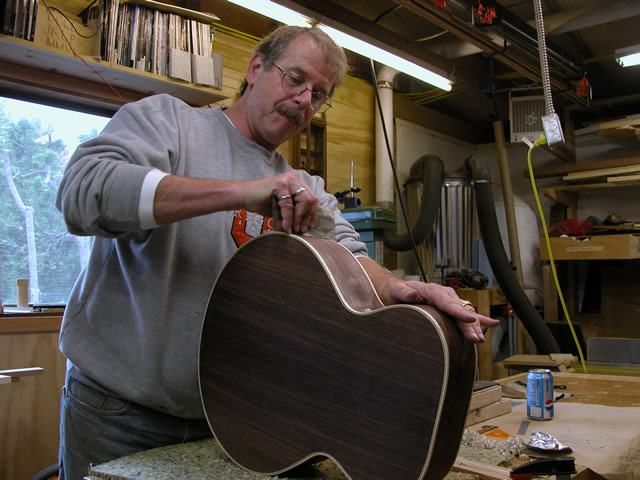
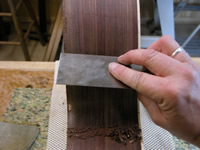
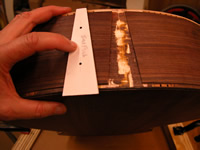
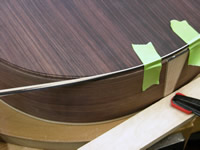
| I removed the tape the next day, and planed off the excess binding/purflings. |
 |
| Finally, I scraped the sides down to almost final finish. |
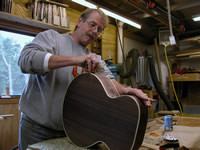 |
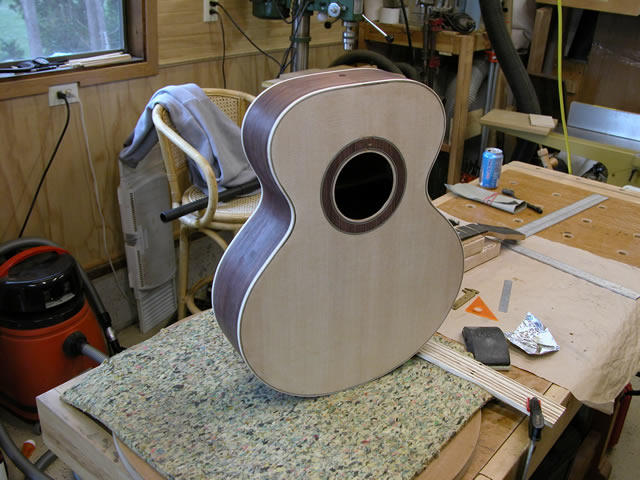
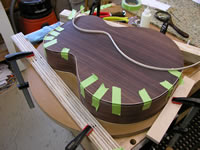
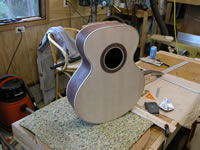
| The bound guitar looks great. Here's the front... |
 |
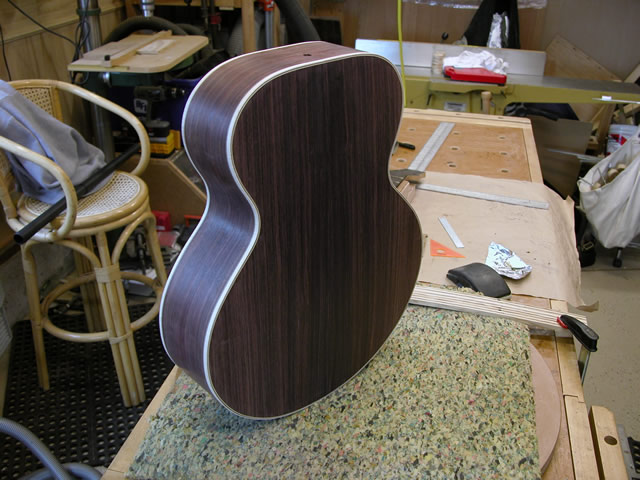
| ...and here's the back. The body's now all done. Next step--assemble
the neck to the body. |
 |
| Elapsed time for these steps:
12 hours... See the main page for the
cumulative time. |
|