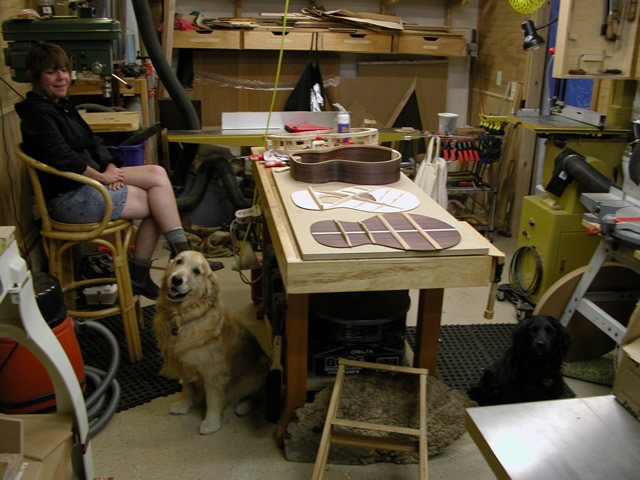
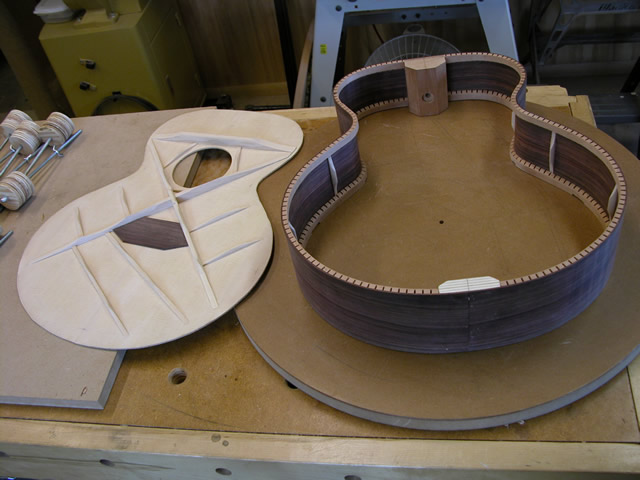
| All three pieces: top, bottom, and sides, are fashioned and ready
to be assembled together and bound, to complete the body of the guitar.
There are many family members anticipating this process... |
 |
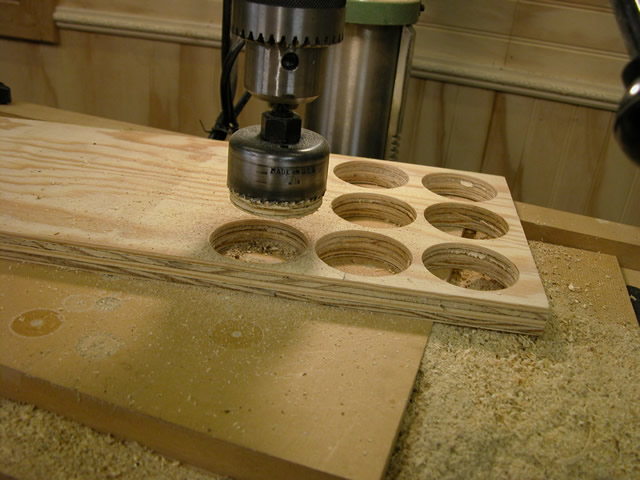
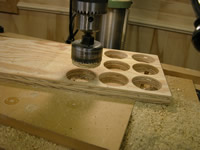
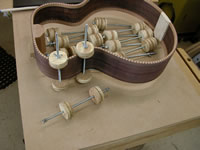
| I began the process by constructing some special clamps
to clamp the top and back to the side assembly. Each clamp consists
of a couple of 3/4" plywood discs. In this case the discs are
2-1/8"
in diameter, which I drilled using a hole saw. |
 |
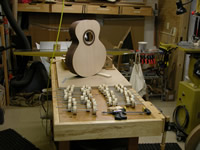
| I laid out the potential locations of the clamps, and
determined that about 32 clamps will work. That's enough clamps to
completely cover the perimeter of the guitar. |
 |
| I then assembled the clamps, using 9" lengths
of 1/4"
diameter all-thread. (I could get 4 pieces out of each a 36" long
stick of all-thread.) Then, I used the hole saw to cut 64 discs of
1/8" cork, and glued the cork to the plywood discs using 3-M
spray-on glue. I placed a cap-screw on one end of each of the all-thread
rods,
placed the plywood/cork discs on the rod, cork facing in, and placed
a wing nut opposite the cap screw. The result was 32 clamps. |
 |
| Elapsed time for these steps:
2 hours... See the main page for
the cumulative time. |
|
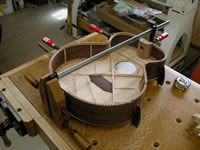
| I began assembly of the body with fitting the top of
the guitar to the side assembly. I shaved all of the top braces down
to zero at their extreme ends (except where they met up with another
brace), and made sure that they did not extend under the linings,
except for the very top brace (the large brace under the fingerboard).
That brace was tapered down to the same height as the adjacent soundhole
brace. These braces were then "let into" the linings. The
hole in the lining for these braces did not pass through the side. |
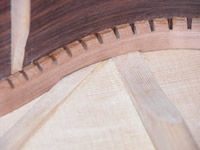 |
| Next, I trimmed back the center reinforcement in the
back to provide for the side assembly end blocks. I used a scraper
to clean up the remaining glue and bits of the center reinforcing
strip that are shown in this photo. |
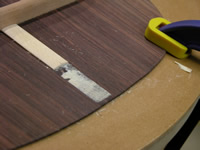 |
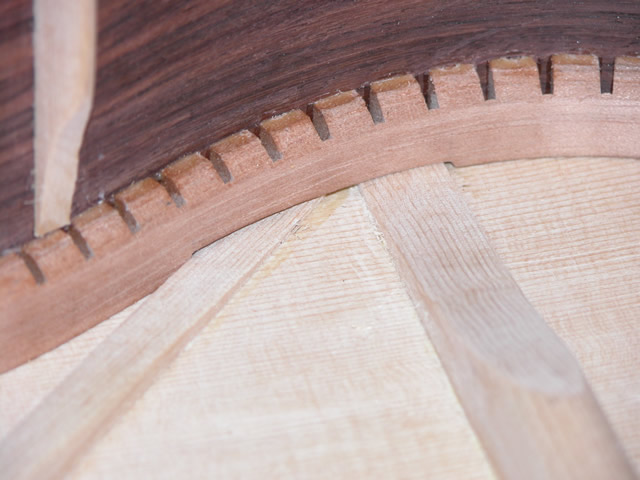
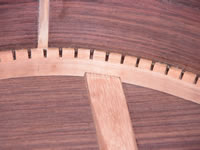
| Additionally, I ensured that the back braces were at
most 1/8" high at the point at which they passed underneath the lining.
Then, I carefully placed the back on the side assembly, marked out
the location of the back braces on the guitar side, and cut out a
dado for the back braces. Since the depth of the back and the brace
are less than the width of the binding, I could dado through the
side. Here's a detail of this dado passing through the side. |
 |
| The interior of the back is visible through the soundhole,
so I was extra careful to cut these dados neatly. |
 |
| I dry-fitted the back to the side assembly to ensure
that everything was OK. |
 |
| I then laid everything out to prepare for gluing the
top to the side assembly. |
 |
| I used AR glue (Titebond), applied to the linings
and sides. I applied the glue with a stiff glue brush; I had to work
fast to avoid having the glue set up. Note that I have all of the
clamps ready to go. Before I applied the glue, I did a complete dry
run. |
 |
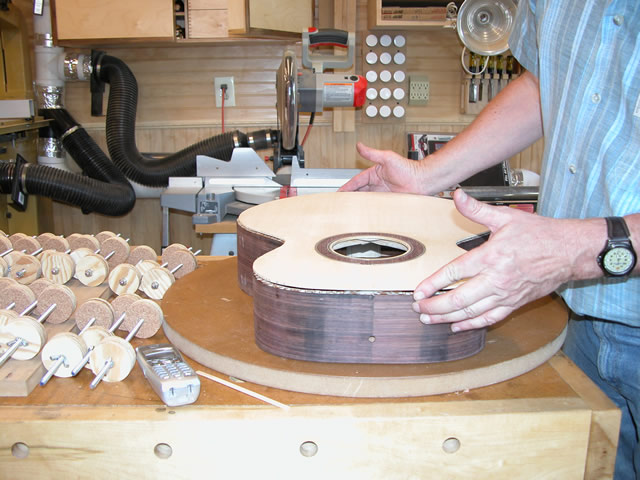
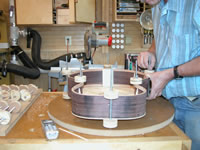
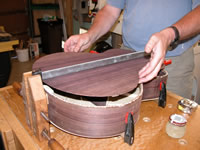
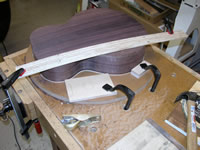
| Once the glue was applied, I placed the top on the
side assembly. It has taken two months for me to get here, so it
was a milestone event that I approached with care and a certain amount
of lutherie reverence. |
 |
| I then flipped the whole assembly upside down. Earlier,
I had placed index marks indicating where the sides should fit on
the top; I did this by clamping the side assembly in the mold and
placing it on the top in the correct orientation. Now, I used these
marks to first clamp the ends in place, then I adjusted the sides
in or out as appropriate to conform to the index marks. Again, I
had to work very fast, since the glue was starting to set up. I'm
glad I did a dry run. |
 |
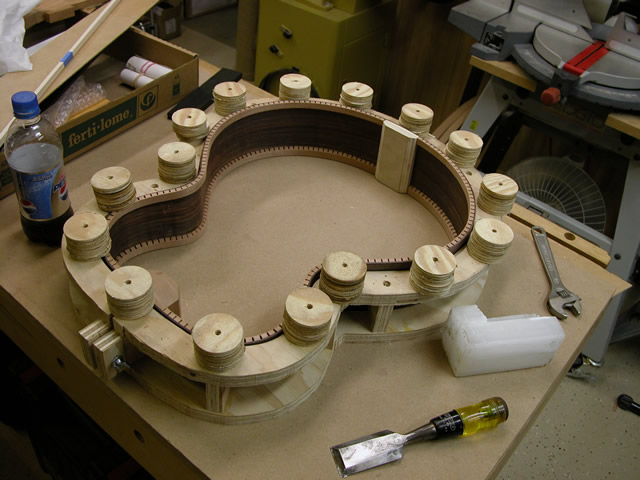
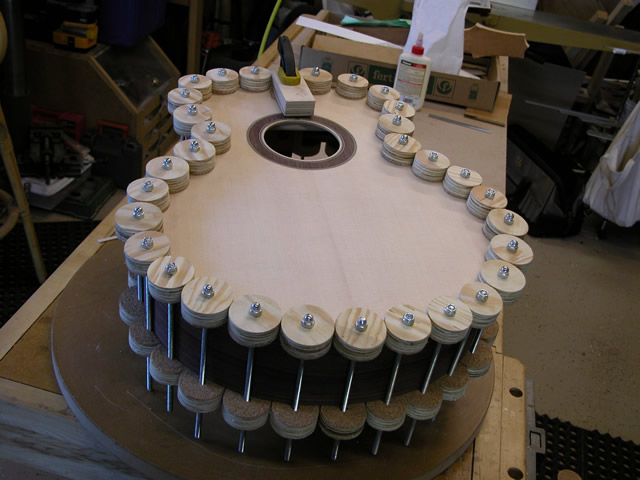
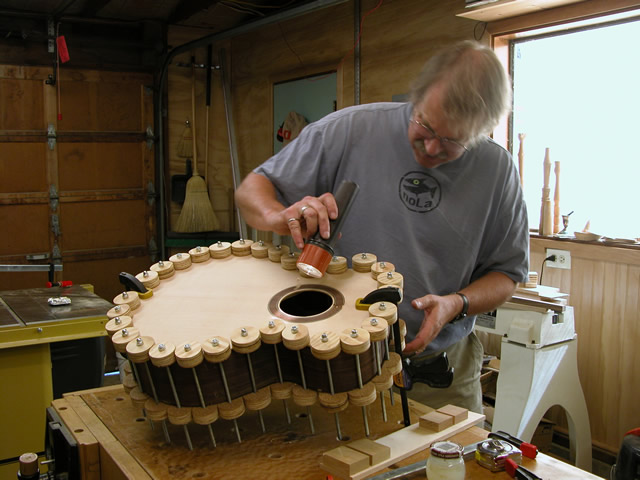
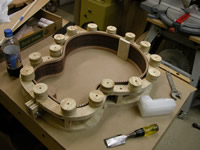
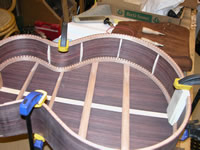
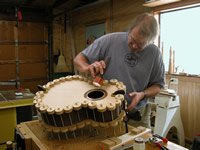
| The back view of the completely clamped assembly. Note
that the clamps cover virtually the entire perimeter. I then re-checked
the tightness of the clamps and left the new assembly to dry. |
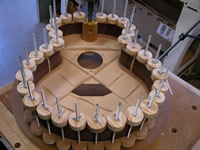 |
| Here's a view from the top. Note that I used a cork-faced
caul to clamp the top onto the neck block, since I needed to apply
pressure farther in from the side than the other clamps were capable. |
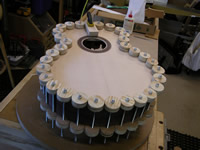 |
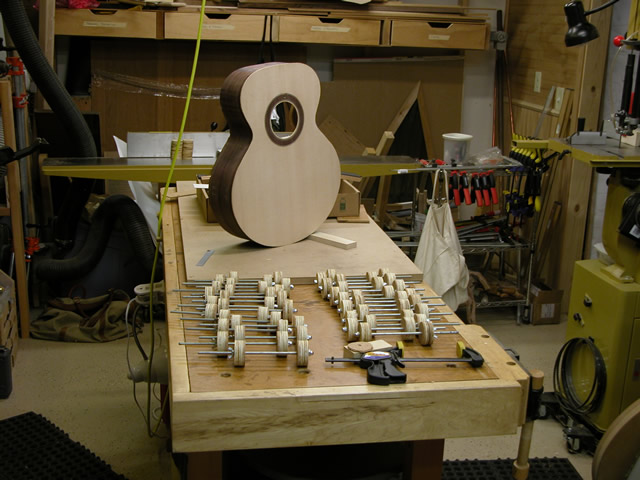
| Finally, after about 2-1/2 hours, I removed the clamps.
The interior looks great. Notice all of the clamps used. |
 |
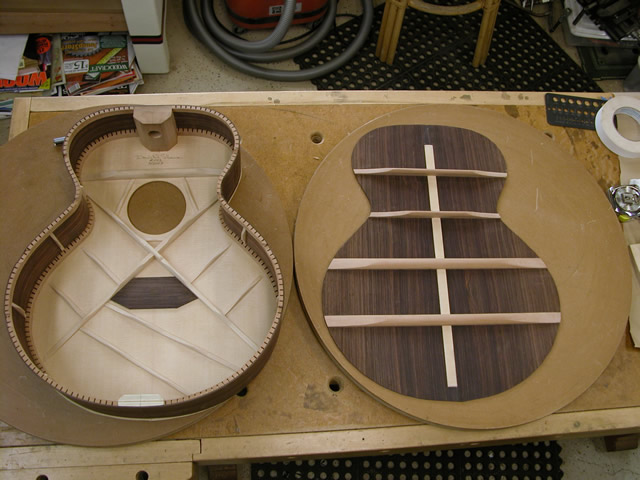
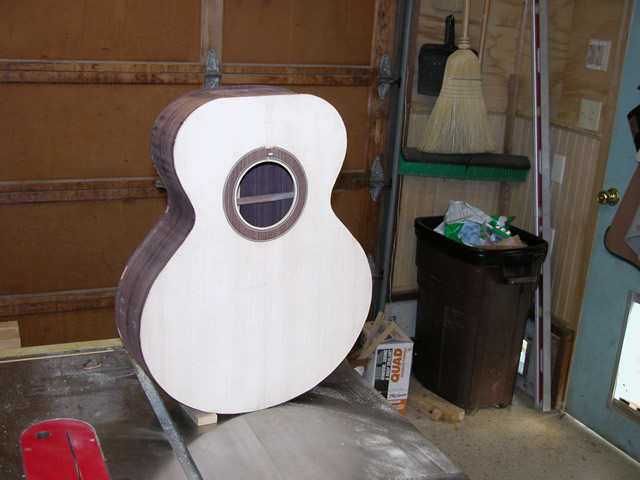
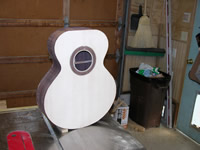
| And--the body is increasingly looking like a real guitar.
Now, I have to work on fitting the neck before I am able to glue
on the back. |
 |
| Elapsed time for these steps:
9 hours... See the main page for the
cumulative time. |
|
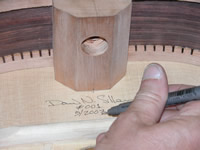
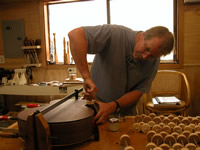
| I have worked with the back off in order to access
the heel block bolt hole, so that I could easily prepare the heel.
I have at this point established the heel angle and installed the
threaded insert in the heel (see the Neck page).
Everything checks out OK, so now it's time to button things up and
glue on the back. Before I close it up, however, I would like to
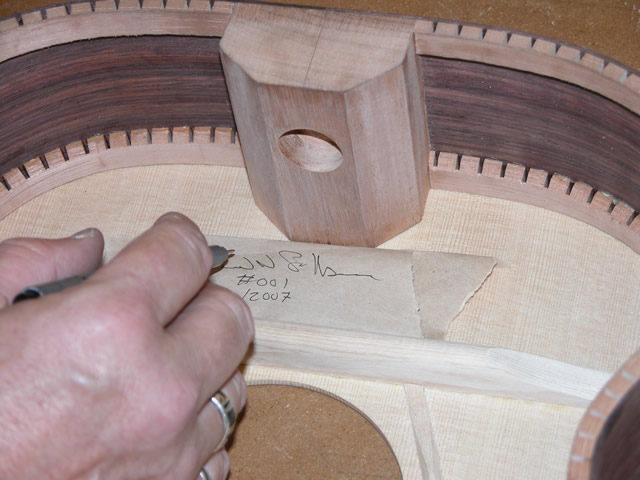
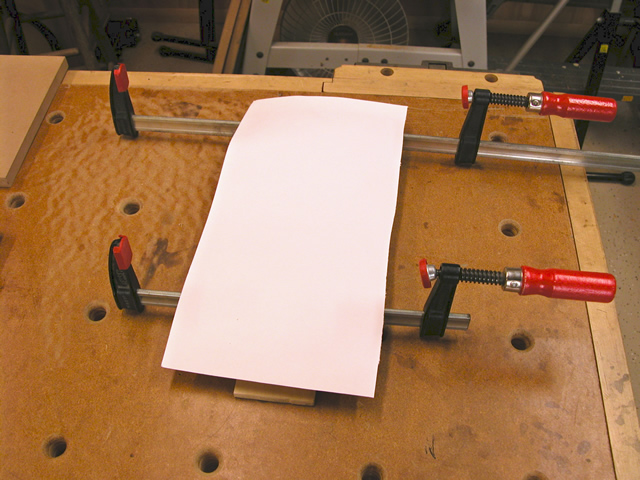
sign the inside of the guitar, on the sound board. I practiced the
signature
on a scrap piece of paper. |
 |
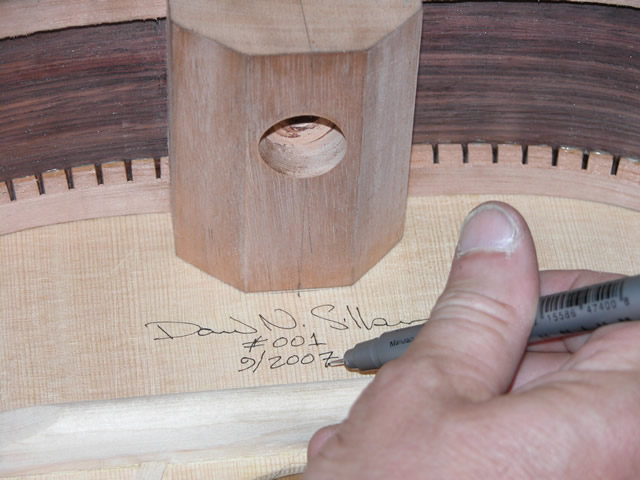
| Once I was satisfied with the signature, I signed the
inside of the guitar with an acid-free permanent marker that I bought
at a craft store. This is guitar #001!!!!!!!!!!! |
 |
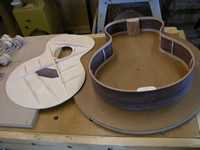
| A final look at the insides of the guitar. I'll never
have this view again. I double-checked to see that everything was
clean on the inside. |
 |
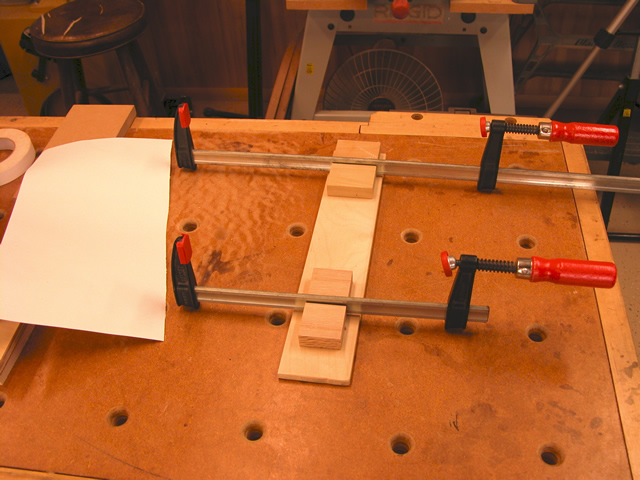
| To glue up the back, I set up a temporary clamping
jig that you see here. |
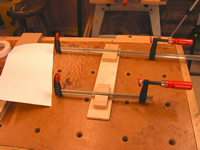 |
| To avoid damaging the soundboard, I placed a piece
of cardboard over the serrated clamp bars. |
 |
| I carefully measured the distances across the bouts
at the soundboard and from heel to heel. I used the clamps to squeeze
in the sides where they meet the back, so that the bout width at
the back (see photo) are the same as the bout width at the
soundboard. |
 |
| I also used an additional clamp to squeeze in the ends
of the guitar, again to equal the dimensions between the ends at
the soundboard. |
 |
| After a dry run and then applying glue, I began
to place the top very carefully on the body assembly. |
 |
| I nestled the top into place, ensuring that the braces
fit snuggly into the slots I cut earlier through the kerfing and
the sides. |
 |
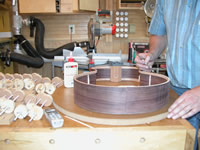
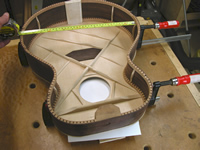
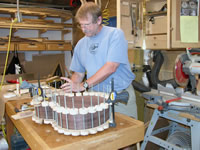
| I am here beginning the tedious process of installing
the clamps around the sides. Note that I have laid the clamps out
so that I can easily get to them. It takes a long time to apply the
glue, so there's little time left to complete the clamping. |
 |
| The first clamps I appliy are over the back braces,
alternating from one side to the other, so that the guitar will be
evenly stressed
in this process. |
 |
| Finally, all the clamps are applied, and I use a couple
of larger clamps to apply pressure at the ends, where the end blocks
extend deeper into the guitar. At this point, I no longer need the
bar clamps which squeezed the sides together. |
 |
| This is my last change to inspect carefully. Fortunately,
I had to make only one minor adjustment where a back brace didn't
seat quite right into its side. |
 |
| Here's a view of the completed body from the front.
Note the back brace showing through the sound hole. |
 |
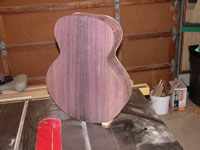
| Another view of the guitar, with the back glued in
place. |
 |
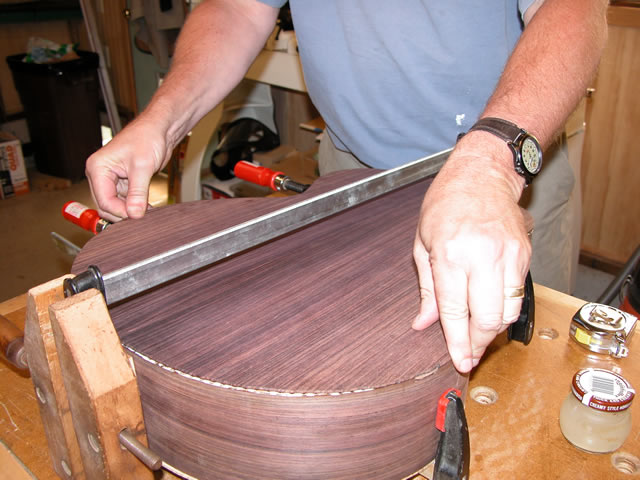
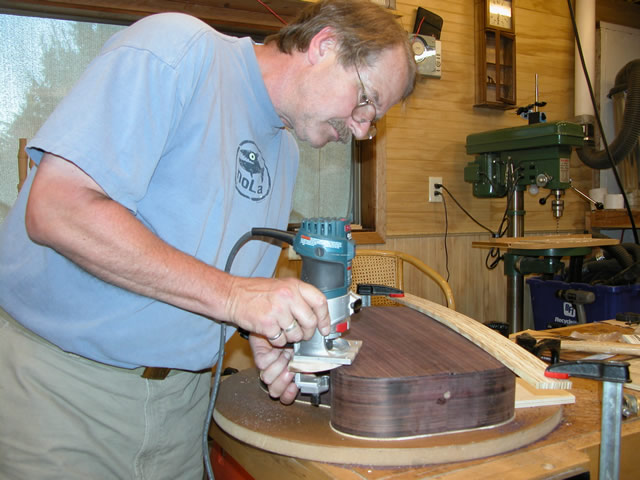
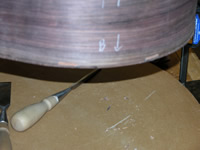
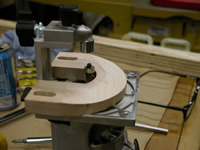
| The back and top were slightly oversize, so I needed
to trim off the excess around the edges. I used my trim router, and
built this jig to be able to index off the side to keep my router
straight,
and
to ride on just about 1/4" of either the top or bottom. The
slanted router plate is necessary to deal with the curvature of the
top and
back. |
 |
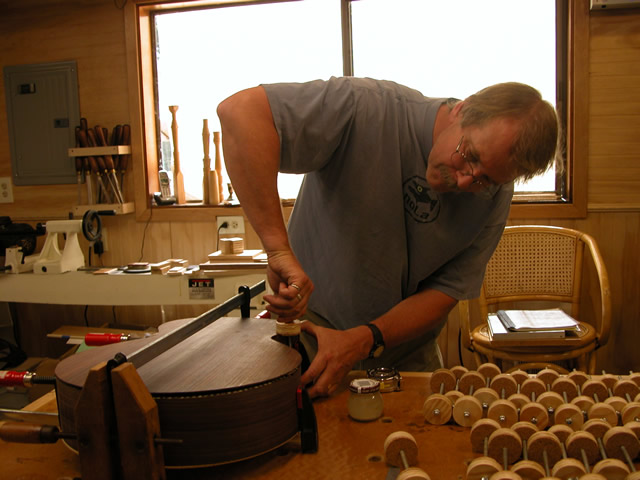
| Before using the router to trim off the excess top
and back, I secured the body to the bench as shown. In order to use
the router jig, I needed to push against the sides, so securing the
body from movement was important. |
 |
| Nothing could have been scarier than taking a router
to the completed body. I have been contemplating that I will need
to do so in order to install the bindings, so trimming the sides
gave me a chance to do a trial run with the router. It was scary,
so I started with the back-- figuring that if something chipped
out, a repair on the back would be less visible. I routed one-half
of the back at a time, routing in the direction of the grain. I moved
carefully, but without incident. By the time I repeated the process
with the top, I had more confidence and I was able to proceed more
quickly. |
 |
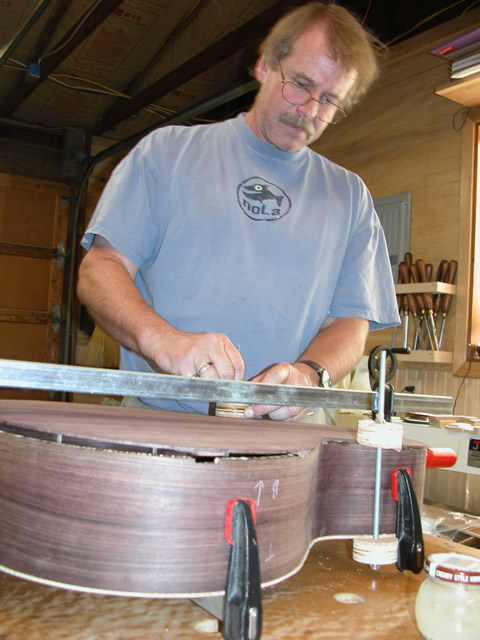
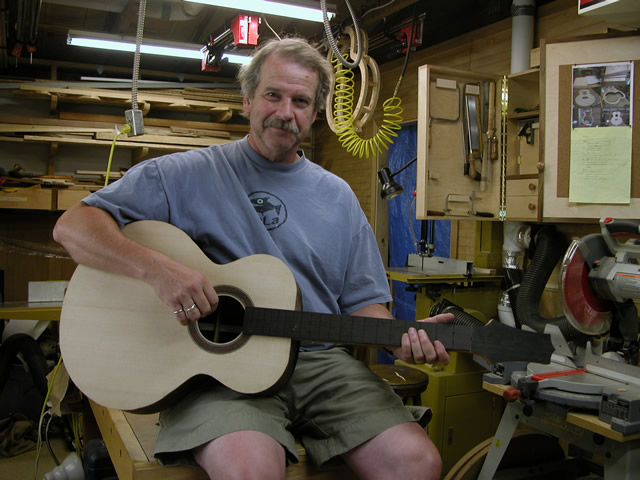
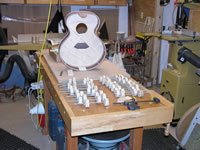
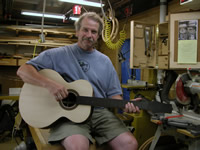
| OK, I couldn't wait. I bolted on the neck and temporarily
put on the fingerboard, just to try out the assembly for size. Now,
back to carving the neck and fine tuning the neck/body connection
at the heel of the neck... |
 |
| Elapsed time for these steps:
3 hours... See the main page for the
cumulative time. |
|