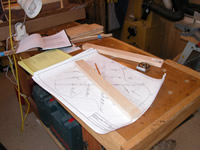
| OK--time for milling the braces. In the kit that I got from LMI,
I received two pieces of quarter-sawn Sitka Spruce that was to be used
milling the braces for both the top and back. I carefully followed
Dan's plan and milled the pieces to the rough dimensions indicated--except,
I blew it. Two of the back braces were shown to be 3/4"wX1/2"h. I,
of course, milled them as 3/4"hX1/2"w. Disaster, since I didn't have
any stock left (LMI didn't assume I'd make any mistakes). So, I contacted
Dan, who suggested that I could substitute some Spanish cedar that
I had for all of the back braces. I happily milled up my Spanish Cedar. |
 |
| I decided to begin the bracing process on the rosewood back of the
guitar. The pieces that I had rough-milled were straight, but the guitar
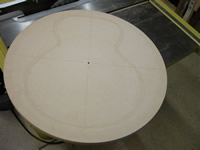
back is to built in a dome shape, with the dome radius at 15'. To accomplish
this, I had purchased a 15' dome working board (pictured), and now
I needed to lay out the guitar on the working board, so that it is
centered to the center of the board. My next steps will be to locate
the back braces on the board. I marked a centered cross on the workboard
and indicated one-inch marks from the center on each leg of the cross. |
 |
| I then placed my form on
the the marked domed working board to establish the outline of the
guitar, and traced out the outline. I now had an indication of where
the perimeter of the guitar would meet with the guitar centerline.
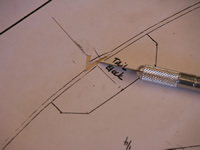
In order to place the plan in the right position, I cut out a small
window in the plan provided by Dan (shown to the right), so that I
could register the perimeter of the guitar on the plan with the perimeter
of the guitar on the workboard. |
 |
| I then slid the plan into place on the workboard. |
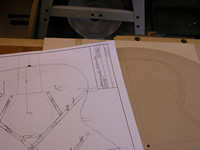 |
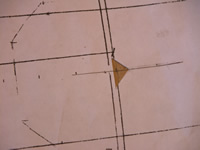
| And then registered the plan's perimeter/centerline with the workboard's
perimeter/centerline. |
 |
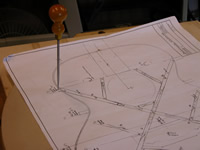
| Now, I could accurately locate the back braces by using a sharp awl
to place small holes in the workboard that indicate one side of the
braces. As suggested, I marked those sides of the braces that would
be least likely seen from the guitar's sound hole. |
 |
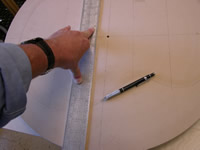
| Finally, I removed the plan and use a straight edge to draw the edges
of the back braces. I'd located the back braces on the workboard. |
 |
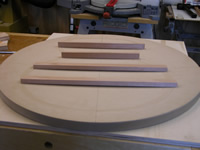
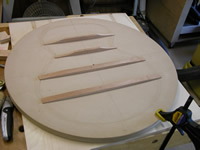
| Here are the back braces placed on the workboard. As can be seen
by the photo, the back braces are straight, but the workboard is domed.
The back braces must be shaped to the same curve as the workboard. |
 |
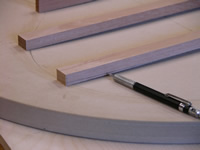
| I began the brace shaping process by placing the back braces in their
position and tracing the dome shape on the brace where it will meet
the back. |
 |
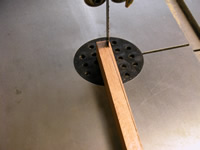
| I used the bandsaw to roughly trim the braces, so that I could reduce
the amount of sanding for the final shaping. |
 |
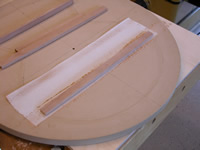
| To do the sanding, I used 150 grit adhesive-backed sand paper strips.
I marked a 1/8" offset to the brace locator line, and placed the sanding
strip on that edge. Then, I marked the bottom of the brace with pencil
and proceeded to sand in the curve. This took a very long time on the
first brace. |
 |
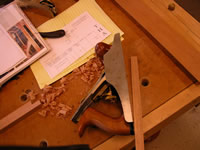
| Because of the experience with the first brace, I learned to plane
the braces closer to the scribed line before sanding (but after band-sawing).
This significantly speeded up the sanding process. I did the planing
by placing my plane on its side and drawing the brace toward me across
the plane blade; this provided better control and accuracy. |
 |
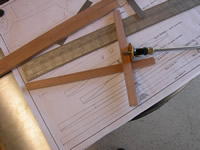
| Next, I marked the profiles of the top of the braces--as shown on
the plans. Only later did I discover that Dan suggests waiting until
the braces are glued in place to cut the profile. |
 |
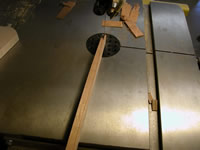
| I used the bandsaw to trim the braces to the plan profile, before
they were glued (contrary to Dan's written instruction--oops.) |
 |
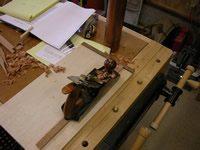
| I tried to use this plane to smooth out the brace to the scribed
profile. Of course, it didn't work. The bottom of the plane is flat,
and the profile is concave. I ended up using the smallest plane that
I have, and planing at a 45 deg. diagonal so that the plane sole would
follow the profile. |
 |
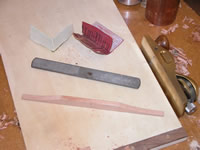
| For the curved portions, I used successively less coarse methods
to get the shape to the plan profile. I moved from a fine rasp to 150
grit and then 220 grit sandpaper. |
 |
| Eventually, I ended up with four well-shaped braces ready for gluing. |
 |
| Elapsed time for these steps: 6 hours... See
the main page for the cumulative time. |
|
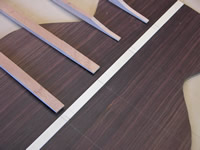
| Once shaped, the back braces must be glued to the back. This picture
shows the back, with the back reinforcing strip attached and the braces
ready to be placed. I placed the back braces on the back, carefully
lined them up with the brace layout lines, and lightly marked either
side of the brace
with a pencil. |
 |
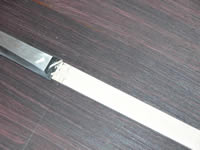
| Following Dan's instruction, I pared away the material
from the back reinforcing strip, leaving the line plus a bit. On the
first fit, I realized that I should leave a generous amount from the
line, since when I fine-fitted the brace into the slot, the reinforcing
strip would compress somewhat. On one slot I over-cut and had to re-glue
a small piece of reinforcing strip and re cut the slot so that I would
have a tight fit. |
 |
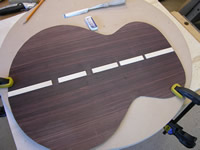
| Finally, all of the slots were cut, the back braces were shaped,
and then came the scary part--the gluing. |
 |
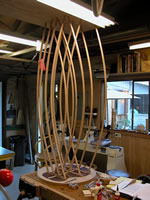
| To do the gluing, I built a go-deck by installing a piece of 3/4'
plywood on the bottom of my trusses, and cut about 16 pieces of oak
at 1/4" X 3/4" X 65". I placed everything carefully
and put glue on the braces. I learned several things: regular TiteBond
glue sets up
pretty quickly in 75+ temperatures, so I had to work fast; I used too
little glue on the first brace and am worried that I don't have enough
glue coverage; I should have worked from the center toward the outside
when setting the braces in place; cleaning up the glue squeeze out
carefully before it fully sets up is difficult but worth it. |
 |
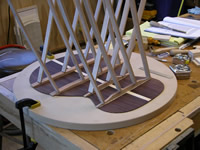
| Here's some detail of the go-deck clamping. Since I thinly profiled
the braces before clamping, the clamping pressure may not have been
well-distributed at the ends of the longer braces; I should either
have placed the clamps farther out on the ends or used more clamps.
When I removed the clamps, I noticed that there are some slight open
spaces between the bottom of my braces and the guitar back. I'll have
to figure
out
how
to close
these
gaps. |
 |
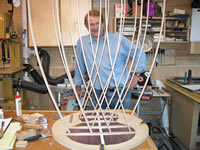
| All in all, however, this was largely successful and looks kind of
artistic when the clamps are in place. This was a great time to have
a goblet of wine and celebrate new knowledge and a peaceful day of
woodworking. |
 |
| Elapsed time for these steps: 5 hours... See
the main page for the cumulative time. |
|
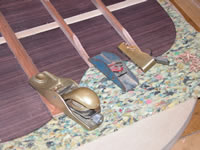
| Although I had prematurely cut the profiles on the braces, the braces
still needed rounding as suggested on Dan's plans. To do the rounding,
I started with a series of planes--my utility block plane, a cheap
little (but very useful) thumb plane, and a tiny plane that I made.
They were
very useful to use in succession to get the braces very close to final
rounded profile. If I had waited to profile the braces until now, it
would have been much easier to properly profile the scalloped ends.
A lesson learned that I'll do differently when bracing the top. |
 |
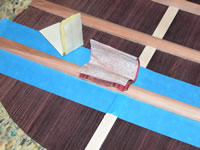
| Finally, I used 150 grit and 220 grit sand paper to do the final
rounding. The masking tape helped prevent damaging the top as I completed
the bracing countours. Tapping the back to hear the tones is a now
great experience; there's a nice mix of various tones, depending on
where
the back is tapped. Now, I've put the back aside and need to refocus
on the top... |
 |
| Elapsed time for these steps: 3 hours... See
the main page for the cumulative time. |
|
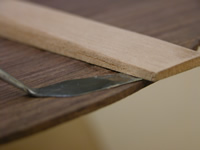
| When I examined the braces after gluing, I discovered that the first
brace I glued had an unacceptable gap at one end; in other words, it
wasn't glued tightly to the back. Although tapping on the back produced
clear tones (with no "buzzing"), I decided to fix this problem. If
it showed up later as a problem after the body was assembled, it'd
be a pain in the neck to fix. |
 |
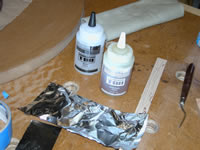
| My choices to fill the gap included using CA glue, Titebond, or epoxy.
In the end, I chose to use slow-setting epoxy. It is good at gap-filling,
stable, and remains workable long enough for me to ensure that it completely
filled the gap. |
 |
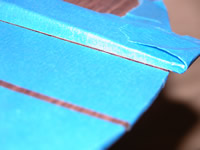
| I masked the area around the gap, so that the epoxy wouldn't coat
the adjacent areas. My experience is that this method works well with
epoxy. Epoxy that dries on the masking tape peels off easily. |
 |
| The gaps filled well and the back should be more stable now. |
 |
| Elapsed time for these steps: 2 hours... See
the main page for the cumulative time. |
|


