The guitar is largely completed; now I need to put a protective finish on it. I have obtained both a water-based finish (KTM-9 from LMI) and a nitrocellulose lacquer (Behlen's Nitrocellulose Stringed Instrument Lacquer). I have experience using brushable N/C lacquer on the furniture that I have built. I like the feel of the lacquer as a finish and I understand it pretty well, but I hate the smell of the solvent. So, I thought I'd try the water-based finish to see how well it works. I also decided to make things more complicated by spraying the finish, which I've never done. I decided to build a simple spray booth. |
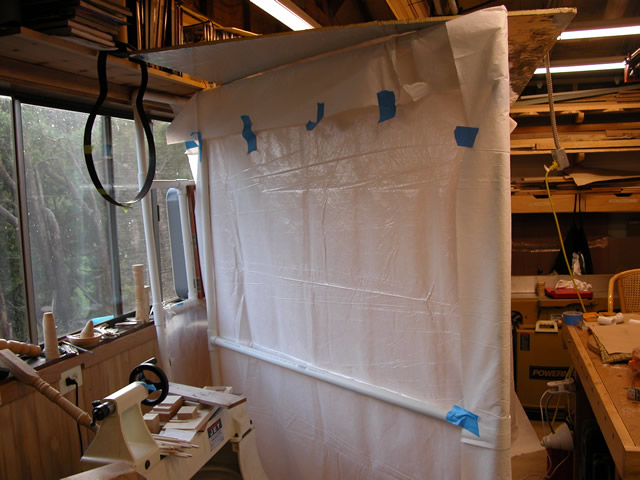 |
| The spray booth is set up in front of the window in my studio. It is made of 1" dia. PVC Schedule 40 pipe and put together with fittings that aren't glued, so that I can take it apart and easily store it while I'm not using it. I found a used box fan at the local Habit for Humanity used materials store, as well as a surplus filter. I placed the fan and filter in front of the window, and used inexpensive drop cloths to cover the PVC frame. Finally, I bought a 1/2 thick piece of foil-faced insulation board, which I placed on top of the structure to reflect light. All together, I spent about $50 for the spray booth. | 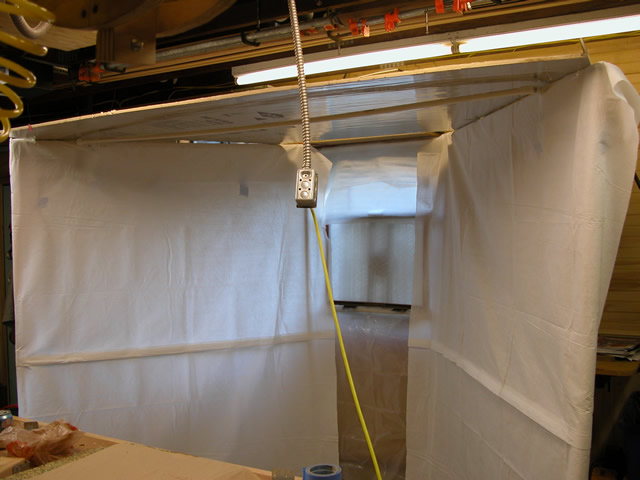 |
| I have never sprayed finishes before, and so I decided to do testing before I undertook this. I probably could have easily brushed on the finish and avoided this process, but this became a good reason (excuse) to obtain some spray equipment. I chose to buy a turbine HVLP system--it is compact and it doesn't create so much overspray, which could be real problem. I started the testing by using some scrap from my guitar materials and mounted them on some scrap pieces of plywood. Here you see these test boards. | 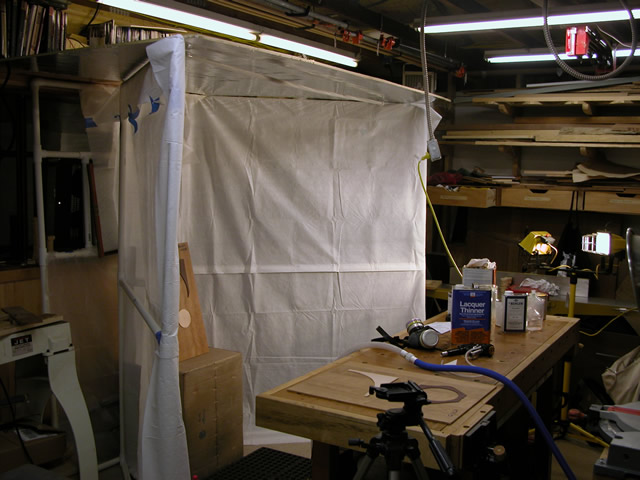 |
| First, I worked on filling the open pores of the rosewood by using Z-Poxy as the filler. I thickened the Z-Poxy with some silica thickener. It didn't take much thickener to create a paste. I put it on the guitar with a small spatula and scraped it off of the surface with a single-sided razor blade. I only applied it once, which I found out (as can be seen below) that one application isn't enough. I left the filler to dry overnight, then sanded it smooth with 320 grit paper. This became the surface for the sprayed finish. |  |
| I gathered all of the equipment and materials for the trial spraying, including the appropriate solvents--lacquer thinner for the lacquer and denatured alcohol for the water-based finish. I also prepared a thinned lacquer solution, using 1 part thinner to 3 parts lacquer. Now, I'm ready to jump into the finishing. | 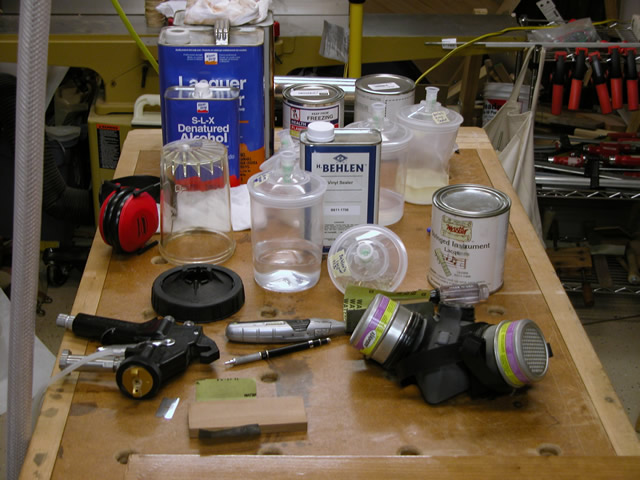 |
| There are many settings available for the gun, including the cap adjustment and the needle adjustment, so I developed a log and kept track what I did as I sprayed. I decided to spray 6 coats of each finish on the first day. | 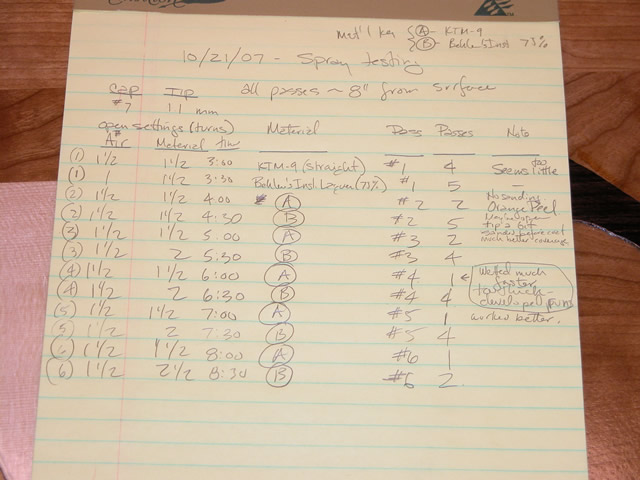 |
| I alternated the finish applications, spraying each finish layer at one hour intervals. It was a long day. | 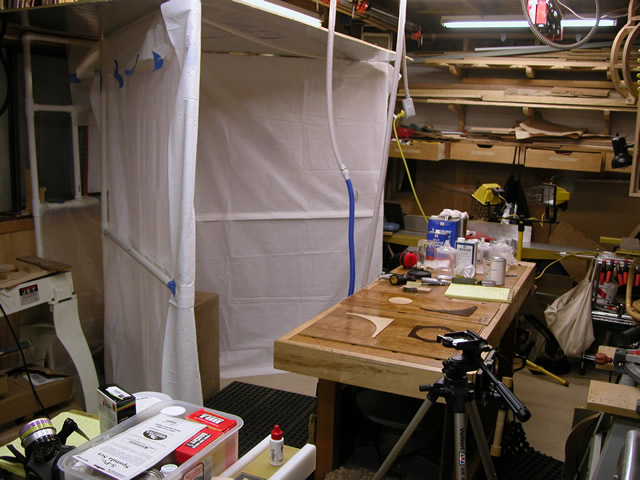 |
| At the end of the day, I had two test panels to inspect. | 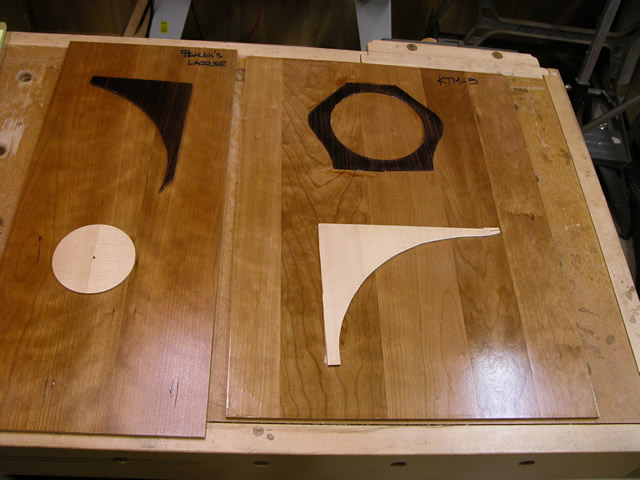 |
| The KTM-9 panel was very glossy and appeared thicker than the lacquer panel. |  |
| However, on close inspection, the finish exhibited a significant amount of "orange peel" and the pores of the rosewood showed through. My conclusion is that I shot the material too thickly and that I should have put on a second layer of epoxy to better close the pores. | 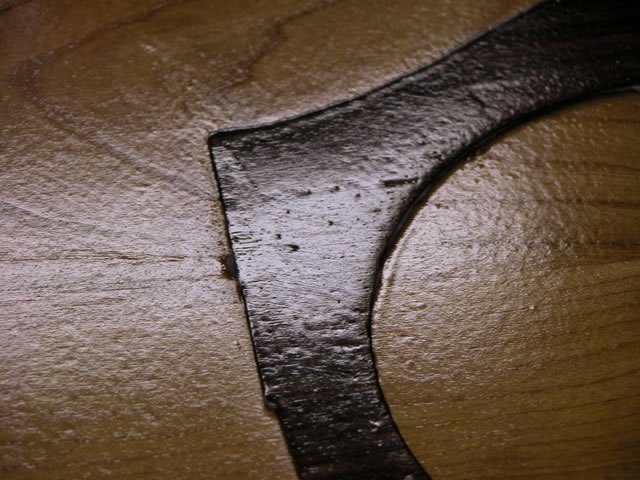 |
| The lacquer layer appeared thinner than the KTM-9 layer. | 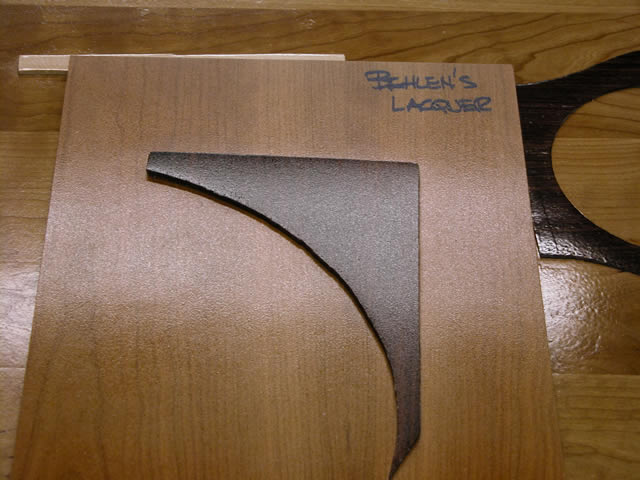 |
| On close inspection, the lacquer layer was rough and the rosewood showed open pores. My conclusion is that the lacquer should have been applied more thickly, and again, the rosewood need another layer of epoxy to close the pores. I will practice more before I start putting material on the guitar. |  |
| Elapsed time for these steps: 14 hours... See the main page for the cumulative time. | |
| After my experimentation with water-borne finish and lacquer, I've decided to use lacquer. Mostly, I think, I like lacquer because I'm used to using it and I understand how to repair it if I should mess up. Probably with more experience using the sprayer, I will turn to use water-borne finishing. I could either brush on the lacquer, buy spray cans, or use my sprayer. Any would probably work OK, but I want to use the sprayer. Now that I've decided how to finish the guitar, I begin prep by sanding--starting with the neck; I'm sanding to 220 grit. I use low-odor mineral spirits to wet the wood after sanding and vacuuming. This removes dust and wets the wood so that I can see any imperfections. | 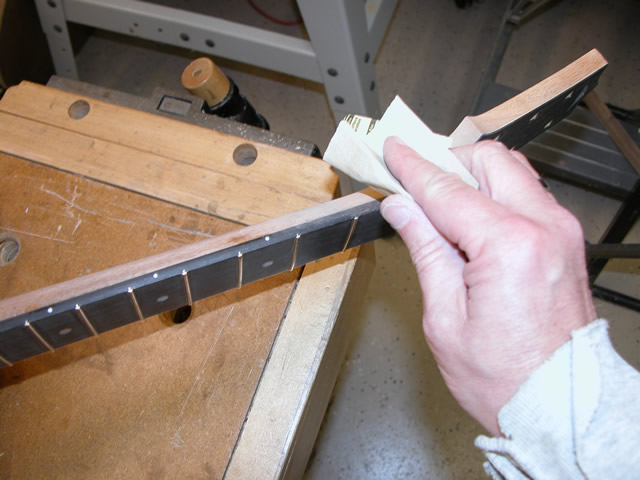 |
| After the neck, I turn to the top. I use a sanding block, starting with 220 grit paper and using the mineral spirits o show scratches and imperfections. I found that in many places, using tape for previous steps, like gluing the binding, had pulled up grains and I had to sand these spots out. It went pretty quickly and I finished with 320 grit paper. I was especially careful when sanding around the rosette, since I didn't want to drive Rosewood dust into the Spruce grain. | 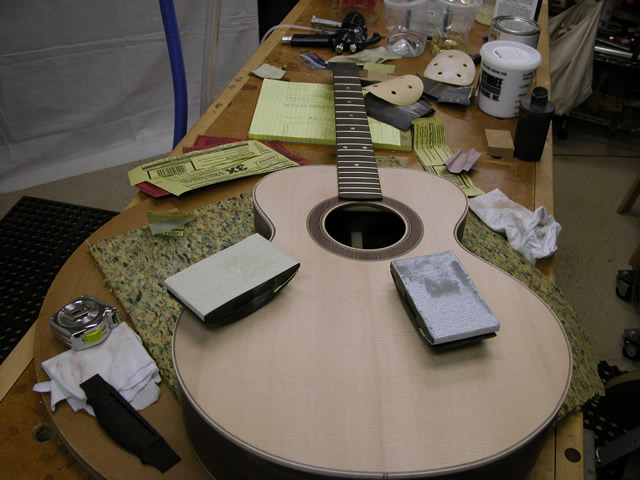 |
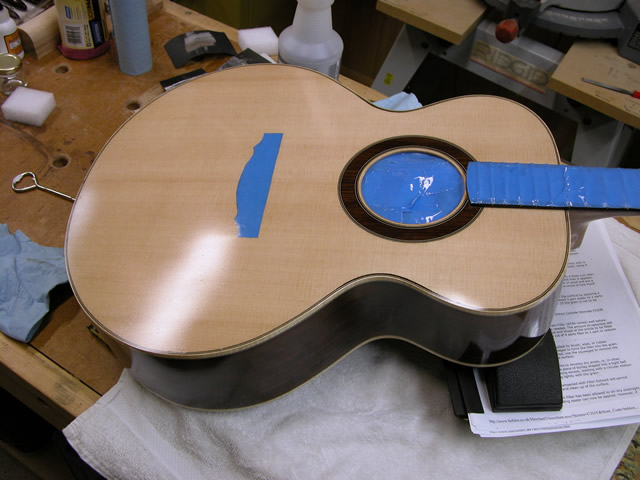
| After preparing the top, I've decided to seal the wood before I work on smoothing the sides and back. My thinking is that I'll develop lots of Rosewood dust and I don't want to have an unsealed top that can get spoiled. So, I begin this process by locating the position of the bridge. I want to mask off the bridge because I want to glue it to bare, unsealed wood. | 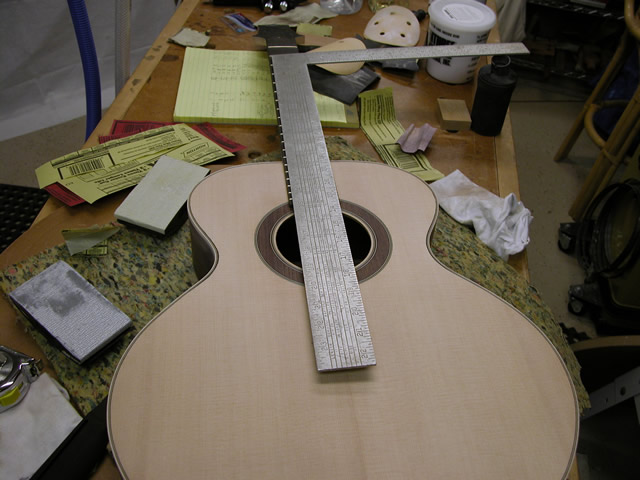 |
| The bridge scale length for my guitar is 25-11/32 inches, so I find this location. My bridge is designed to have 1/8" in front of the saddle, to provide "compensation". So, the front of my bridge will be placed at the scale length, and the saddle will be compensated by 1/8" at high E and by 1/4" at low E. |  |
| I very lightly mark the location of the bridge on the top, and place it so that it will be centered on the fingerboard. This gives me the location for the masking tape. | 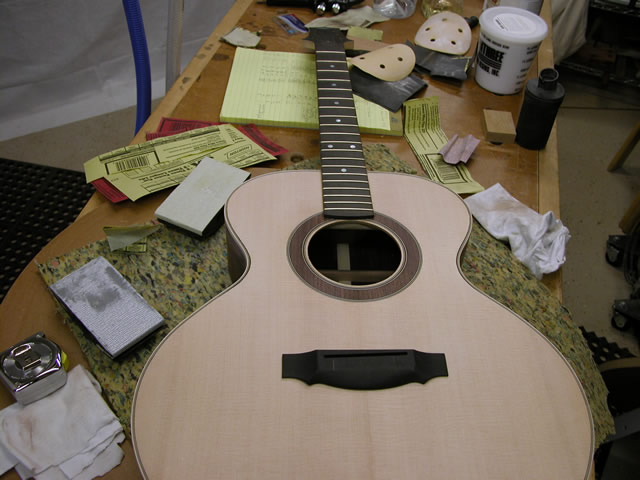 |
| I place a large piece of masking tape (the tape is for "delicate surfaces") over the area of the bridge. I then trace the outside of the bridge, and draw a line 3/32" inside of the outside outline. Using an Exacto knife, I then lightly cut the tape to the inner line. This will provide me a mask for gluing on the bridge, and will allow some finish to occur just under the edge of the bridge. | 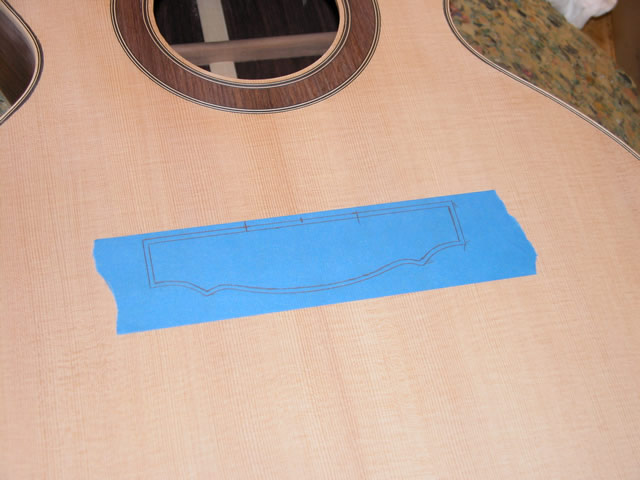 |
| I mask the rest of the guitar in areas that won't be receiving finish, including the fingerboard and the sound hole (to not get finish inside the guitar). | 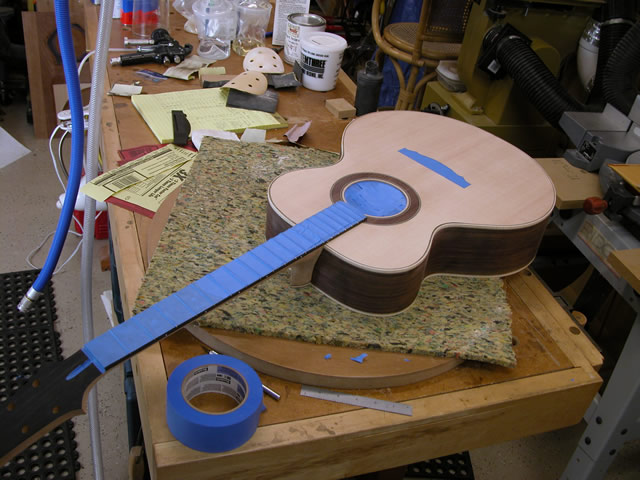 |
| I placed the guitar inside my spray boot, and I block it steady with a couple of pieces of scrap 2x4. I will using Behlen's Vinyl Sealer to seal the guitar. The instructions say that it should be used full-strength, not thinned. I also masked off the guitar sides, although I don't really think this is necessary. | 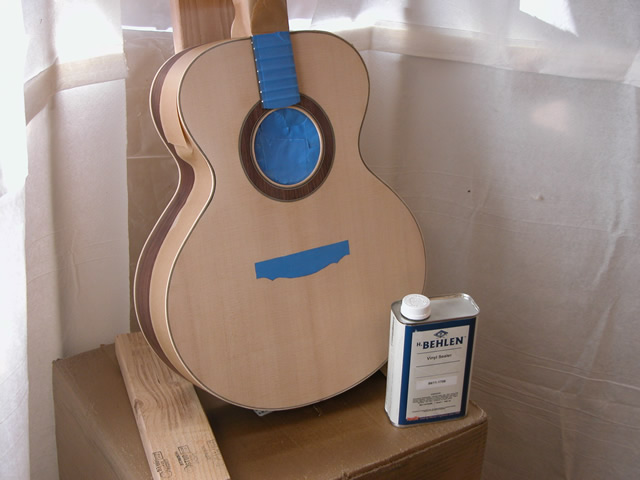 |
| To seal the top, I spray two light coats of sealer, each separated by an hour. When dry (after another hour, I very lightly draw 320 grit sandpaper across the surface to remove any roughness. | 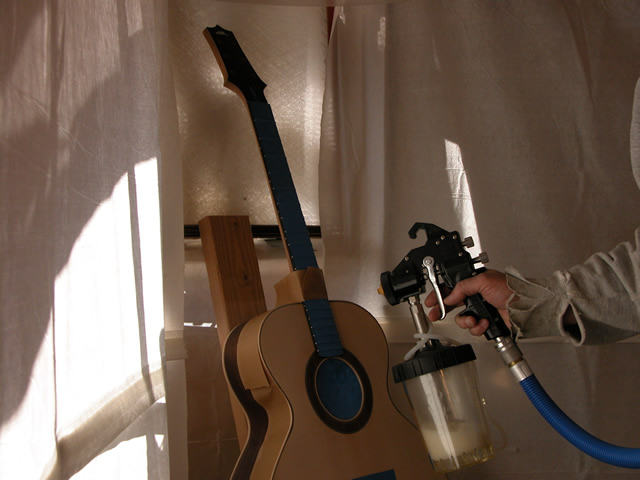 |
| With the top is sealed, I thoroughly sanded the neck, sides and back to 220 grit. I blew off the guitar with compressed air and wiped it clean with mineral spirits. The next step is to seal the open pores in the rosewood and mahogany. Otherwise, when I apply the lacquer, the pores will show in the final finish. I chose to use Z-Poxy and to thicken it with a silica thickener (a System 3 product). I mixed up a small amount of the epoxy, and added the silica to it, creating a cream-like mixture. I then applied the mixture to the rosette, neck, sides and back (in that order). | 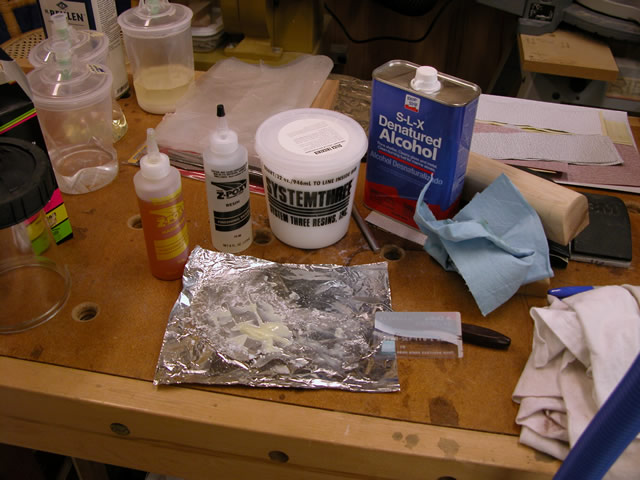 |
| Here, you can see the result of the first layer of epoxy filler. I spread the mixture in a diagonal pattern to better help work the mixture into the pores. I used a credit card (actually, one of those fake, promotional cards that you get in the mail) to spread the epoxy. this worked well, but was awkward on the tight curves of the heel. | 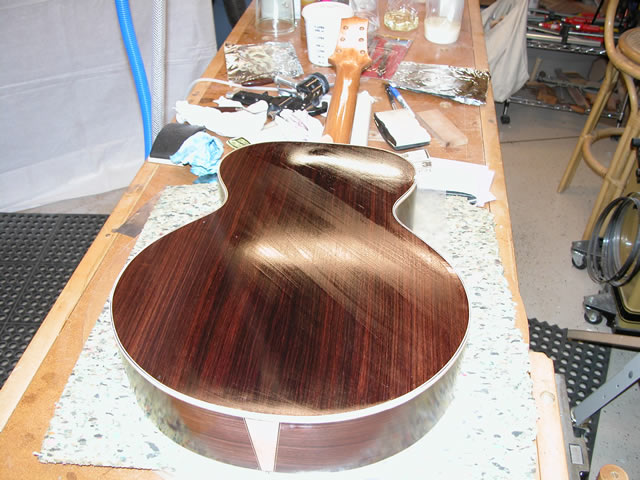 |
| I then hung up the guitar to allow the epoxy to dry overnight. |  |
| After the epoxy had dried for about 7 hours, I sanded the first coat of epoxy with 220 grit paper. The paper loaded up quickly and I had to change paper many times. I think that I should have let the epoxy dry for a longer period. | 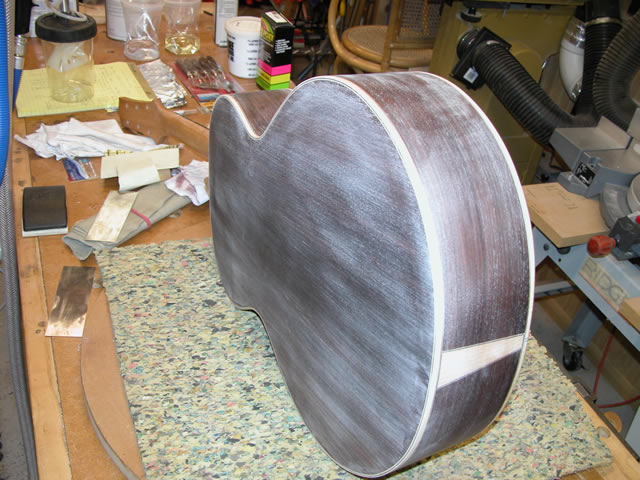 |
| Once sanded, I applied a second coat of epoxy. On this coat, after applying the epoxy with the credit card, I smoothed the epoxy using a cotton cloth dampened with denatured alcohol. This seemed to work well to level out the epoxy and should speed up the next round of sanding. | 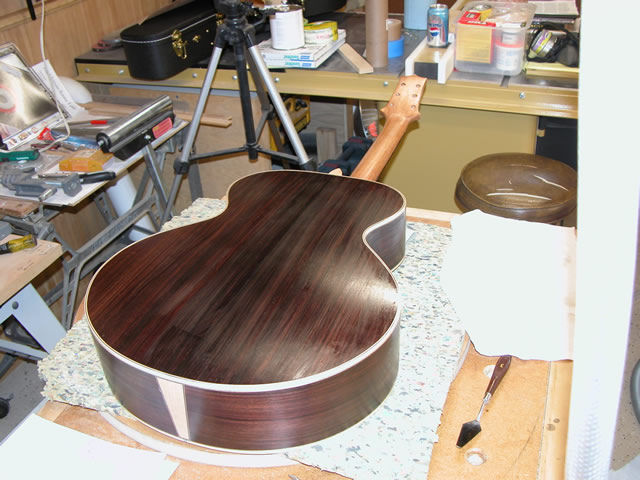 |
| I hung up the guitar to allow the second layer of fill to dry. This time, I will let it dry for a longer period of time--at least 24 hours. I sanded the second layer of epoxy and thoroughly examined the guitar. I wetted a cloth with mineral spirits and wiped the guitar. This made the guitar appear as it might under the final finish, and I found a handful of problem areas. On the back of the head, a few carving marks showed up; the joint where the neck joins the body was very rough and had a few small holes that the epoxy hadn't filled up yet; the back had a few pores, especially near the edges that weren't filled to my satisfaction; and the rosette had a small sliver of opening beside one of the purflings that didn't fit quite right. | 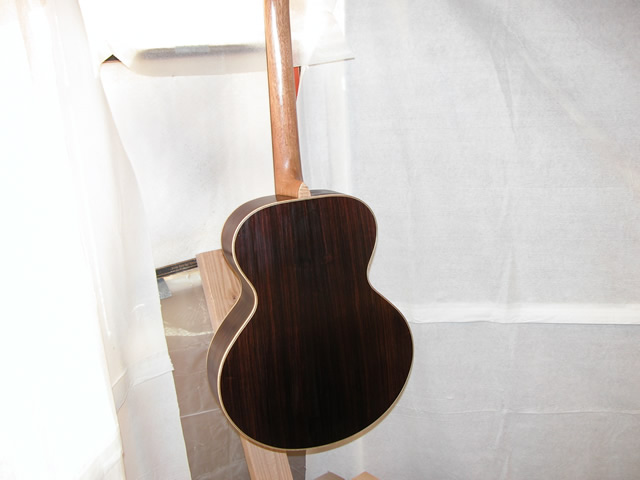 |
| I applied one more layer of epoxy on the trouble areas, and carefully checked over the entire guitar, feeling every square centimeter for any imperfections. Where any were found, I sanded them smooth. In this final process, I sometimes sanded through the surface epoxy finish (which is extremely thin). In itself, this isn't a problem because there will be a lacquer finish to protect the guitar. However, the sanded-through areas may show up as a different color than the epoxy-covered surface, so I put a final "wash" of epoxy over the back, neck, and sides by using a one-to-one ratio of denatured alcohol and epoxy (no silica thickner). I applied the wash with a makeup sponge and wiped it out with an alcohol-soaked rag. | 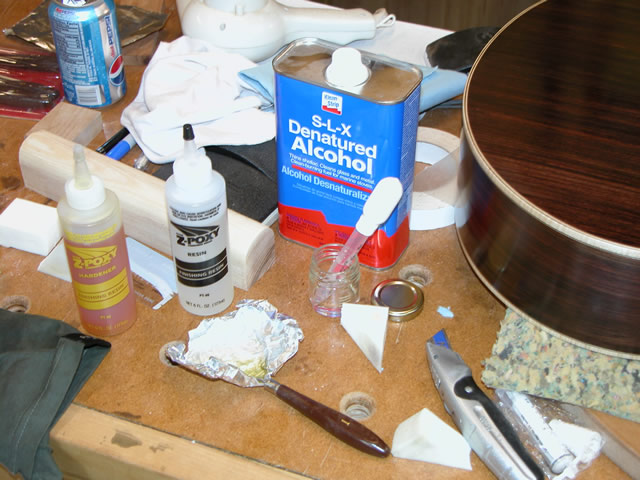 |
| Elapsed time for these steps: 14 hours... See the main page for the cumulative time. | |
I allowed the epoxy wash to cure overnight, then I very lightly sanded the epoxy surface with 320 or 400 grit paper to improve adhesion and to level any surface roughness, and sprayed on one light coat of vinyl sealer, which I scuff sanded with 320 grit paper and cleaned off the dust with a mineral sprits-soaked cloth. I prepared a solution of 2/3 lacquer, 1/3 thinner and sprayed an initial, very thin tack coat, lightly sanded, then sprayed four "wet" coats of lacquer over the entire guitar. I left the guitar to dry for two days. |
 |
| Once the lacquer had dried for two days, I sanded it "flat" using 220 grit wet sand paper, using water as the lubricant. This was very helpful, since it kept the paper from immediately binding with lacquer dust. I worked on small areas at a time, changing paper frequently, using styrofoam sanding blocks. Also, at this stage I found a few areas where there were small gaps at the purflings, which I filled with thick CA glue. Also, there were some other gaps that I filled with lacquer, using a small brush. | 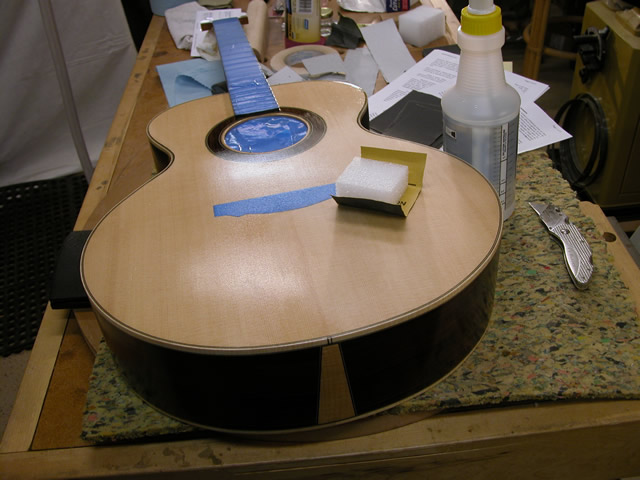 |
| Finally satisfied with the flatness of the guitar and the obvious gaps are filled. I sprayed on a second round of lacquer. This time, I applied somewhat thicker coats, since I think that my earlier coats were a little too thin. I applied one wet coat on each surface, waited five minutes, then applied a second coat. Waited one hour and repeated this process. The result is shown here. Here's the order I followed. Holding the guitar by the neck, I sprayed the end (near the end flash first), then each side. Still holding by the neck, I sprayed the top and bottom, then the headstock. I then hung the guitar and finished the neck. | 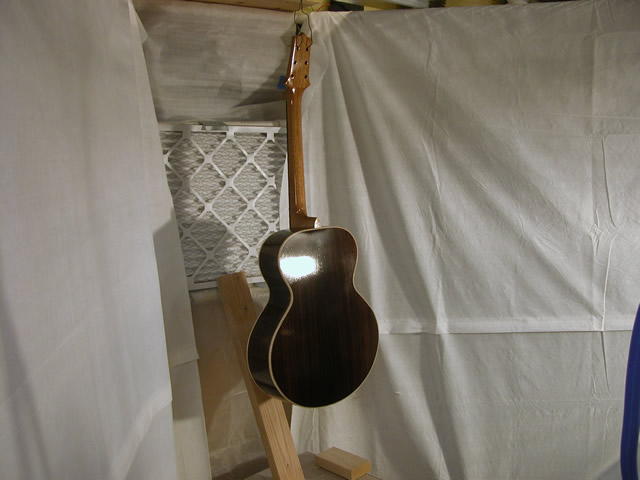 |
| After the second layer of lacquer cured for a week, I sanded the guitar flat to 320 grit. I discovered a few places where there were still some gaps, pores, and other small imperfections, although these types of blemishes were much reduced from earlier. I sanded thoroughly, and used a variable speed random-orbit palm sander on lowest speed with 400 grit paper to smooth much of the top and back, supplemented with "block" sanding. Finally, I re-sprayed just the top and back with a 25%-thinned lacquer mixture, including about 10% lacquer retarder. You can see the result here. I'll let this cure for two days. | 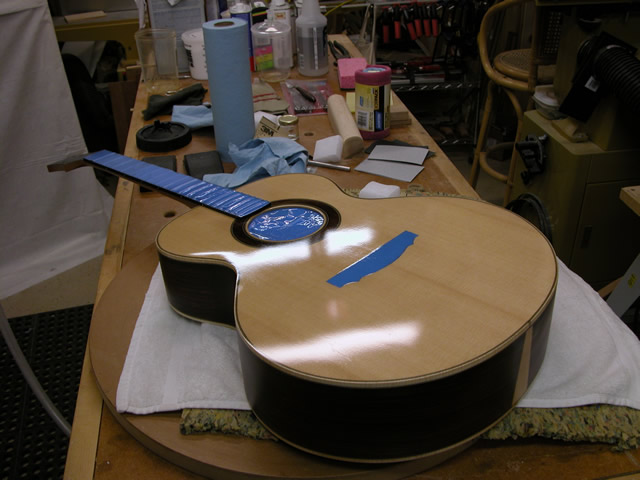 |
| Elapsed time for these steps: 10 hours (I didn't count the time in between coats when I got some other stuff done--like yardwork)... See the main page for the cumulative time. | |
I've wet sanded the back and top to 400 grit. In doing so, a very few spots of imperfection showed up--all along the areas of the bindings. I used a small artist's brush and applied several layers of full-strength lacquer to solve these problems and touched up the sanding. I then prepared a final lacquer cocktail--60% lacquer, 30% thinner, 10% retarder and applied two final coats. Each coat consisted of two passes, and I waited one hour and lightly sanded between coats. The result looks great. I have just a little touch-up to do on the headplate, but otherwise, I'll now let this cure out for about one week before I move on to polishing out the finish. Whew! |
 |
| I started the polishing with some cut polish. I applied the polish with one cloth and then wiped off the haze with another. I applied the same process with two other, successively finer types of polish. | 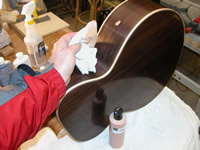 |
| The final results are shown in the photo. It looks pretty good, but I think that next time, I will work a little more slowly on the polishing process. Since I have to do some additional work on the guitar, I'm sure that it'll get a little scratched. That'll give me a reason to do an additional polish. | 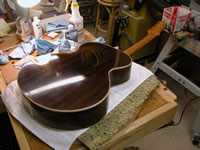 |
| Elapsed time for this steps: 8 hours . See the main page for the cumulative time. |